<?xml version="1.0" encoding="utf-8"?>
<feed xmlns="http://www.w3.org/2005/Atom">
  <author>
    <name>Zenlydsp</name>
  </author>
  <generator uri="https://hexo.io/">Hexo</generator>
  <id>https://blog.zenlydsp.top/</id>
  <link href="https://blog.zenlydsp.top/" rel="alternate"/>
  <link href="https://blog.zenlydsp.top/atom.xml" rel="self"/>
  <rights>All rights reserved 2026, Zenlydsp</rights>
  <subtitle>你的温柔乡~</subtitle>
  <title>Zenlydsp's Blog</title>
  <updated>2026-11-03T01:04:39.910Z</updated>
  <entry>
    <author>
      <name>Zenlydsp</name>
    </author>
    <category term="BMM" scheme="https://blog.zenlydsp.top/tags/BMM/"/>
    <category term="mincraft" scheme="https://blog.zenlydsp.top/tags/mincraft/"/>
    <category term="paper端插件" scheme="https://blog.zenlydsp.top/tags/paper%E7%AB%AF%E6%8F%92%E4%BB%B6/"/>
    <category term="BlueMap" scheme="https://blog.zenlydsp.top/tags/BlueMap/"/>
    <content>
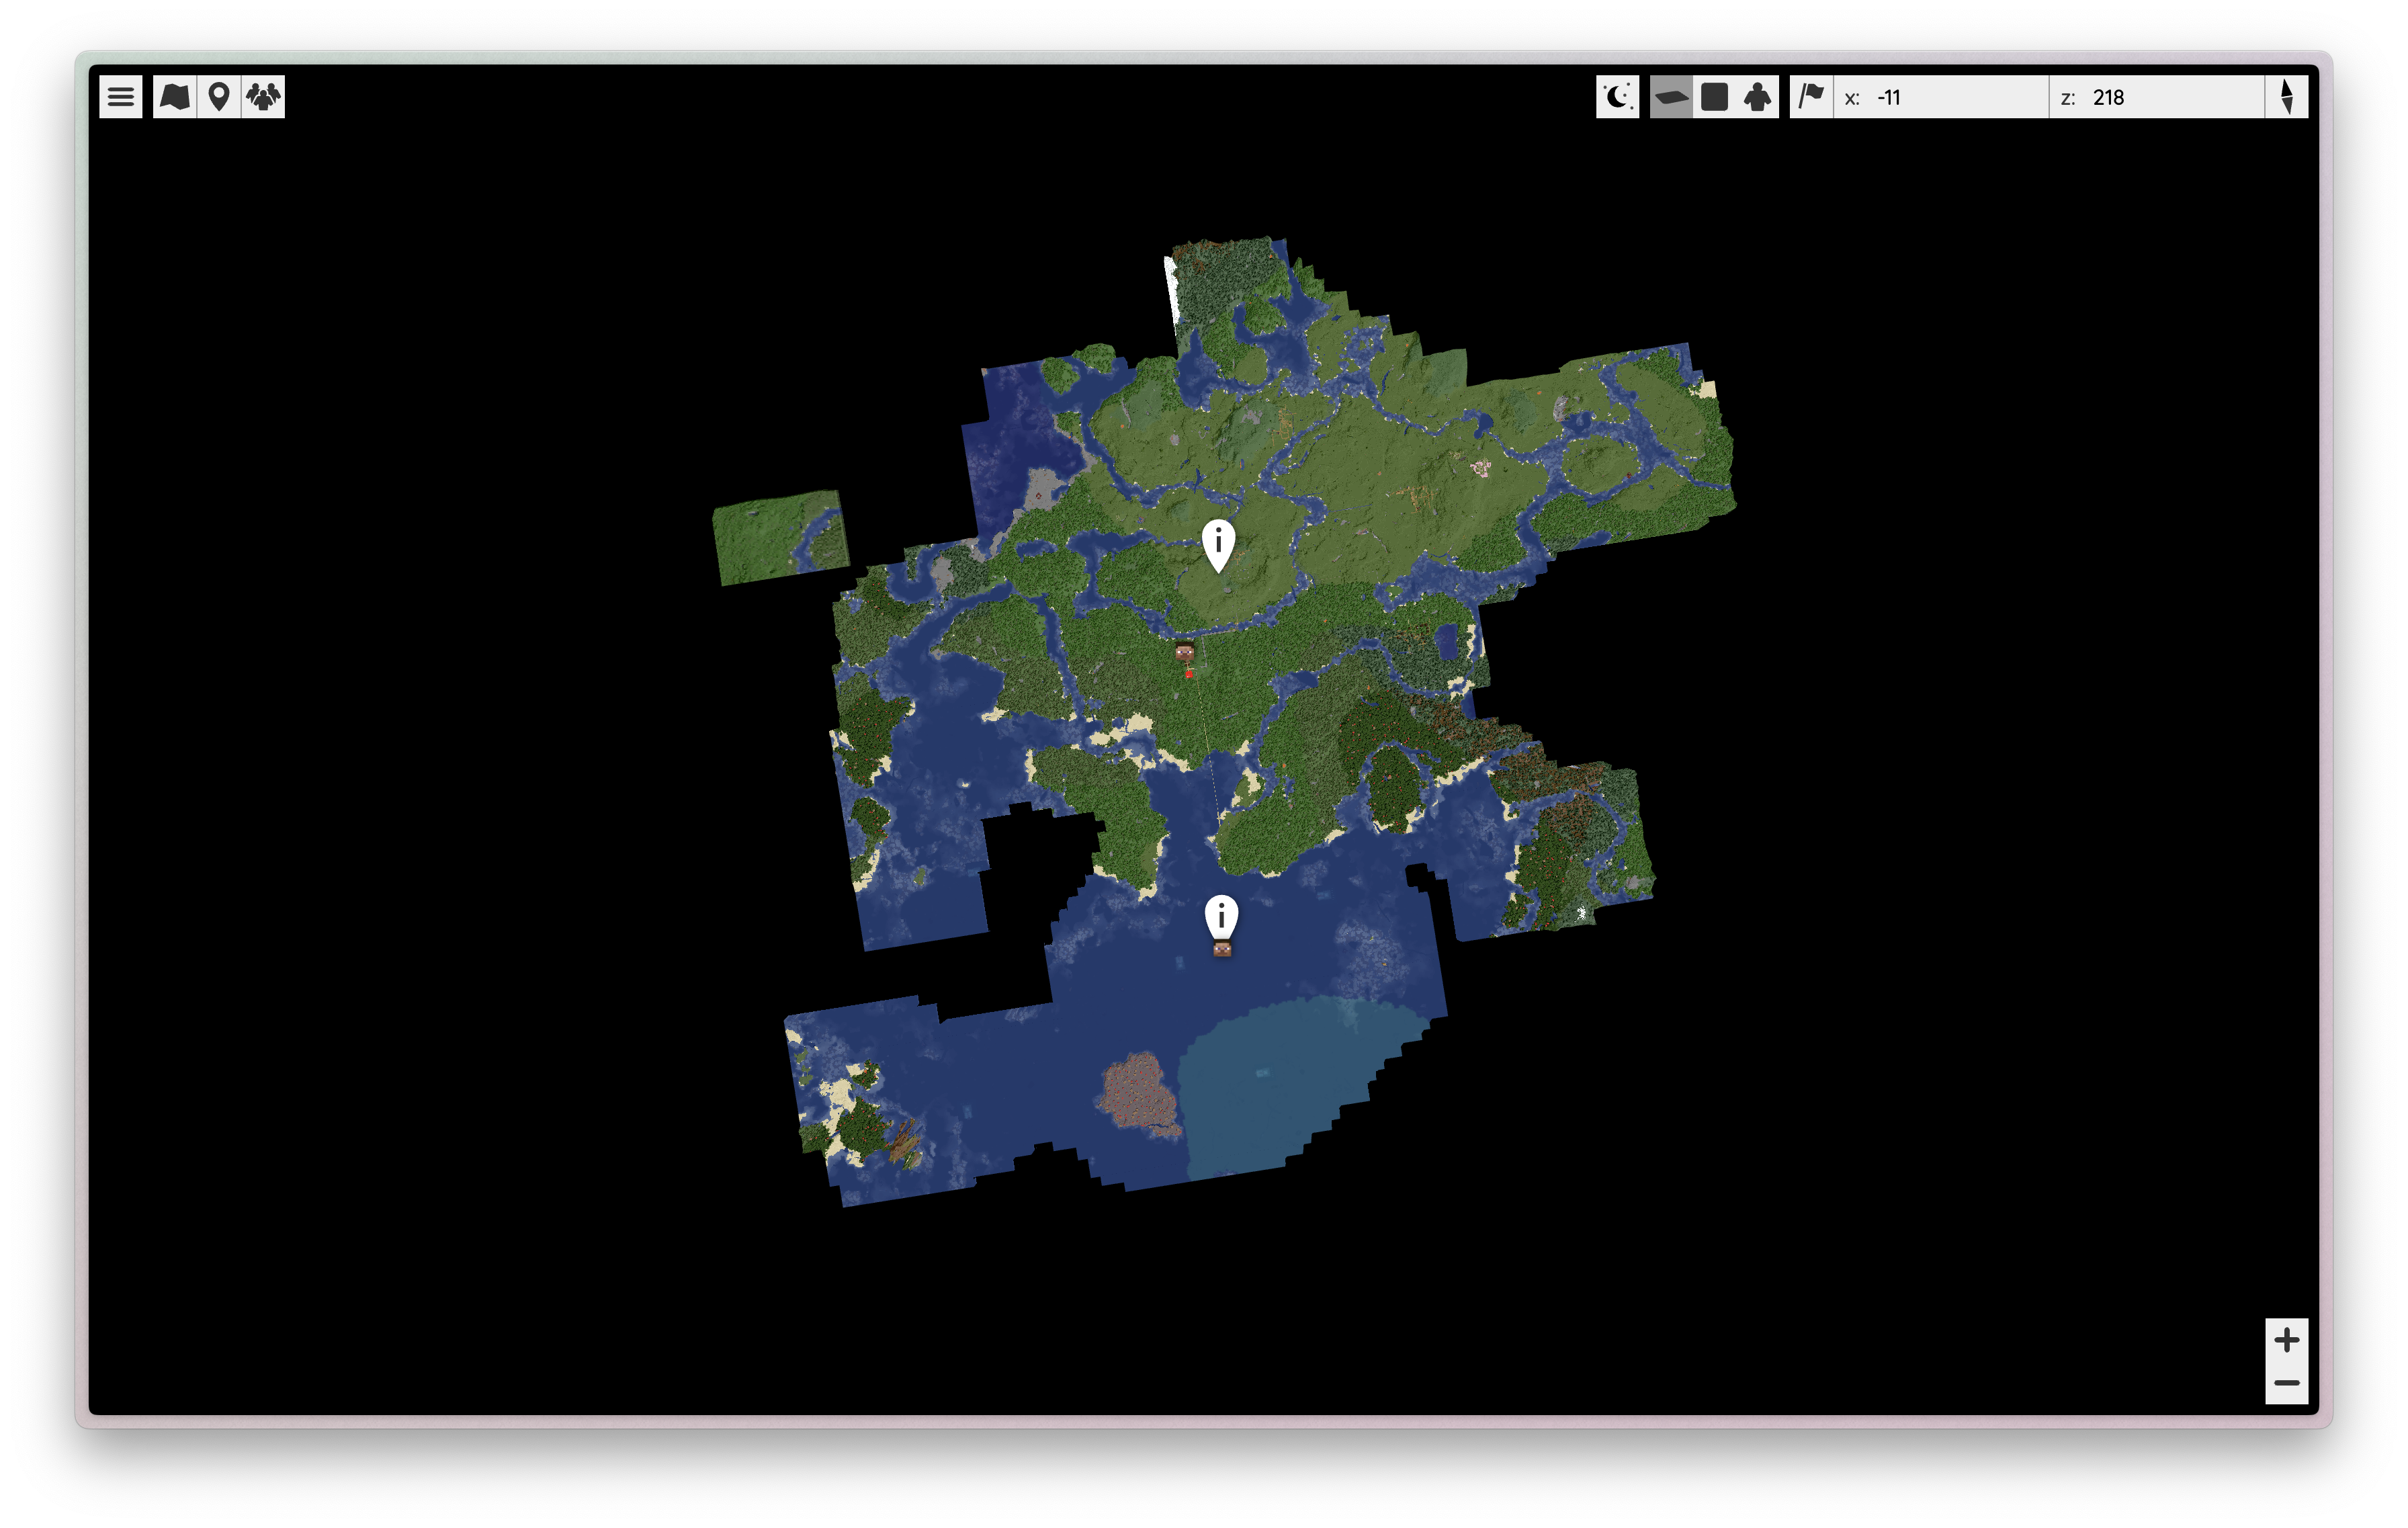
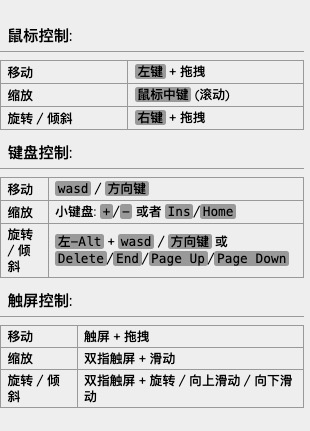
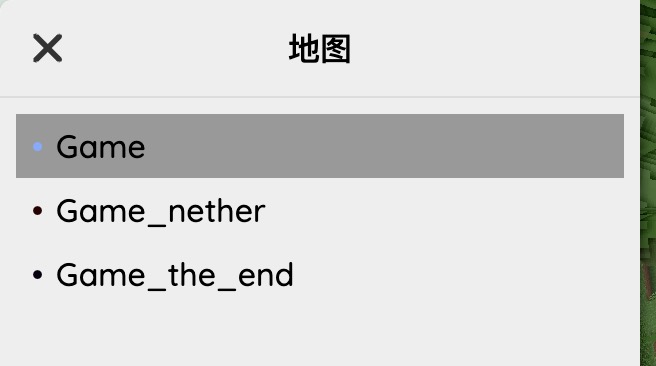
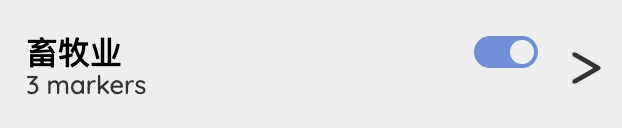
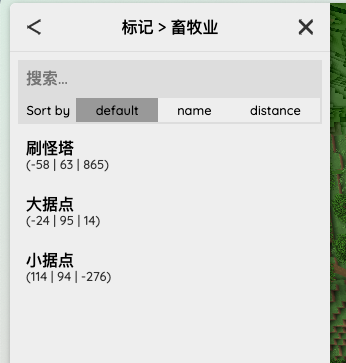
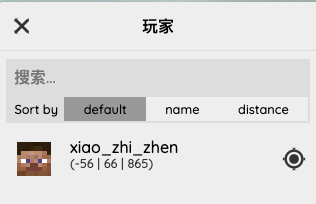
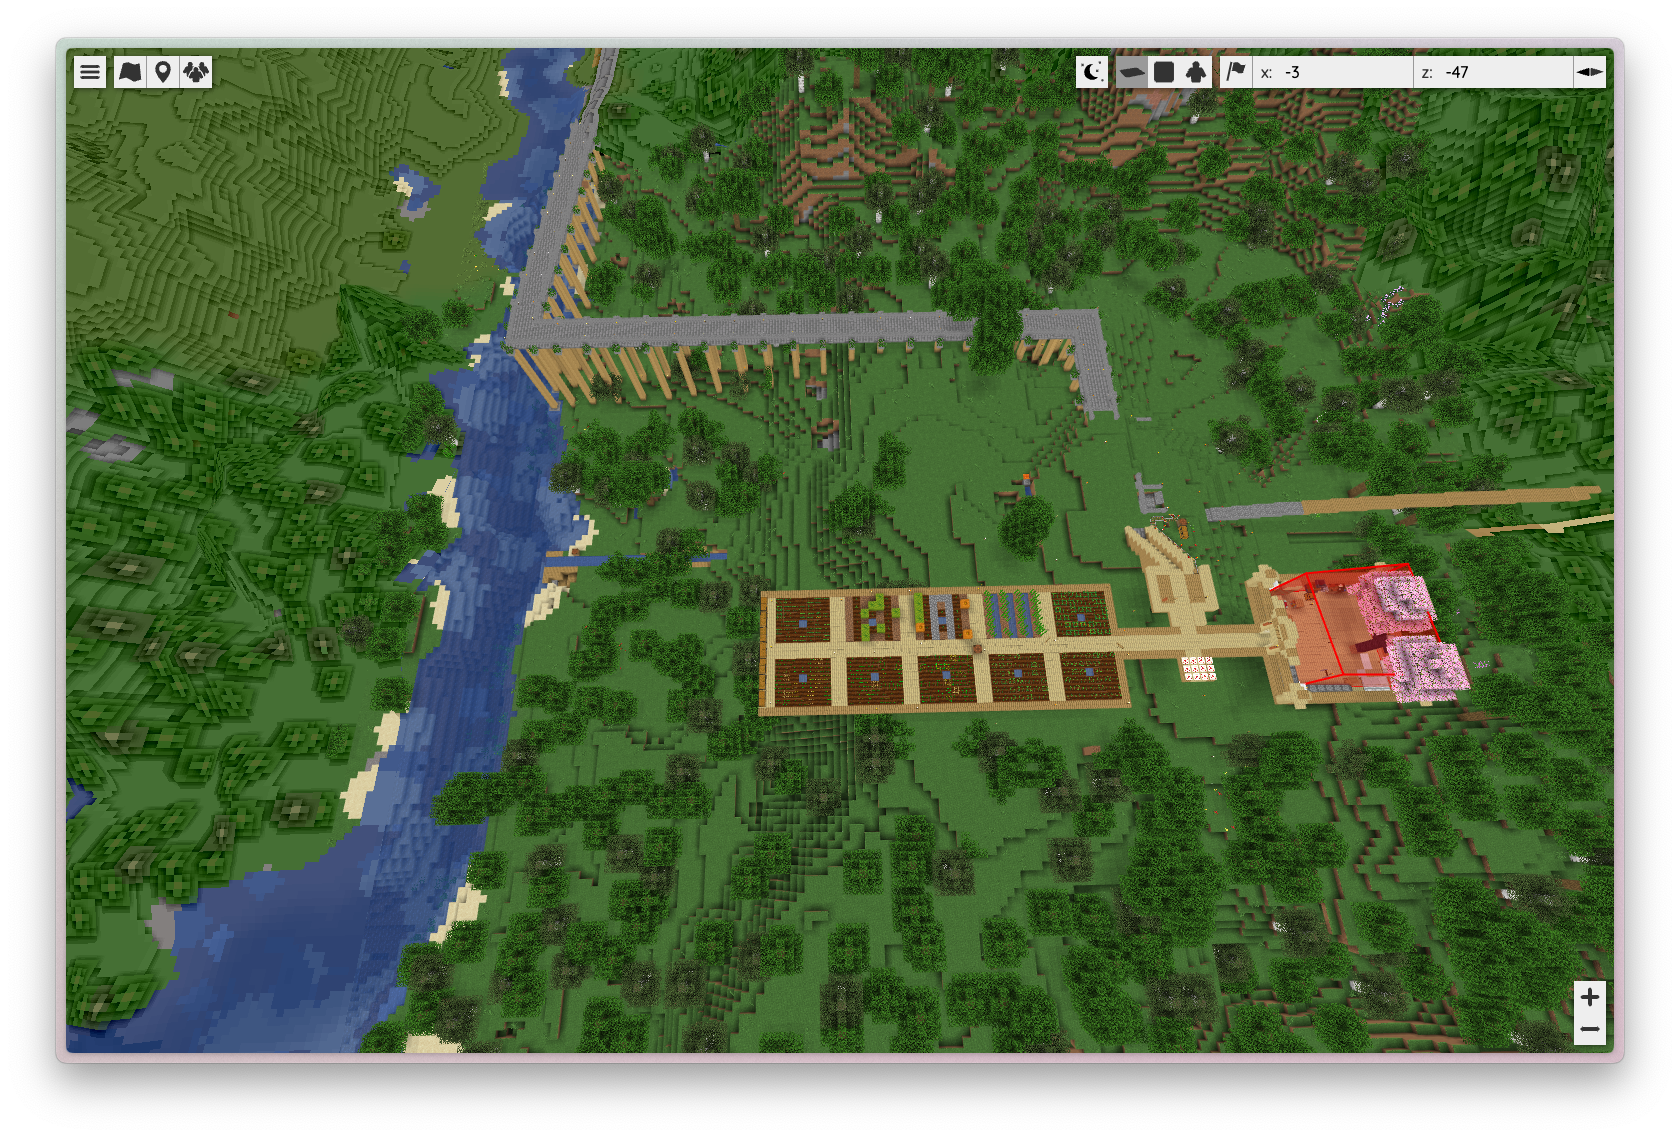
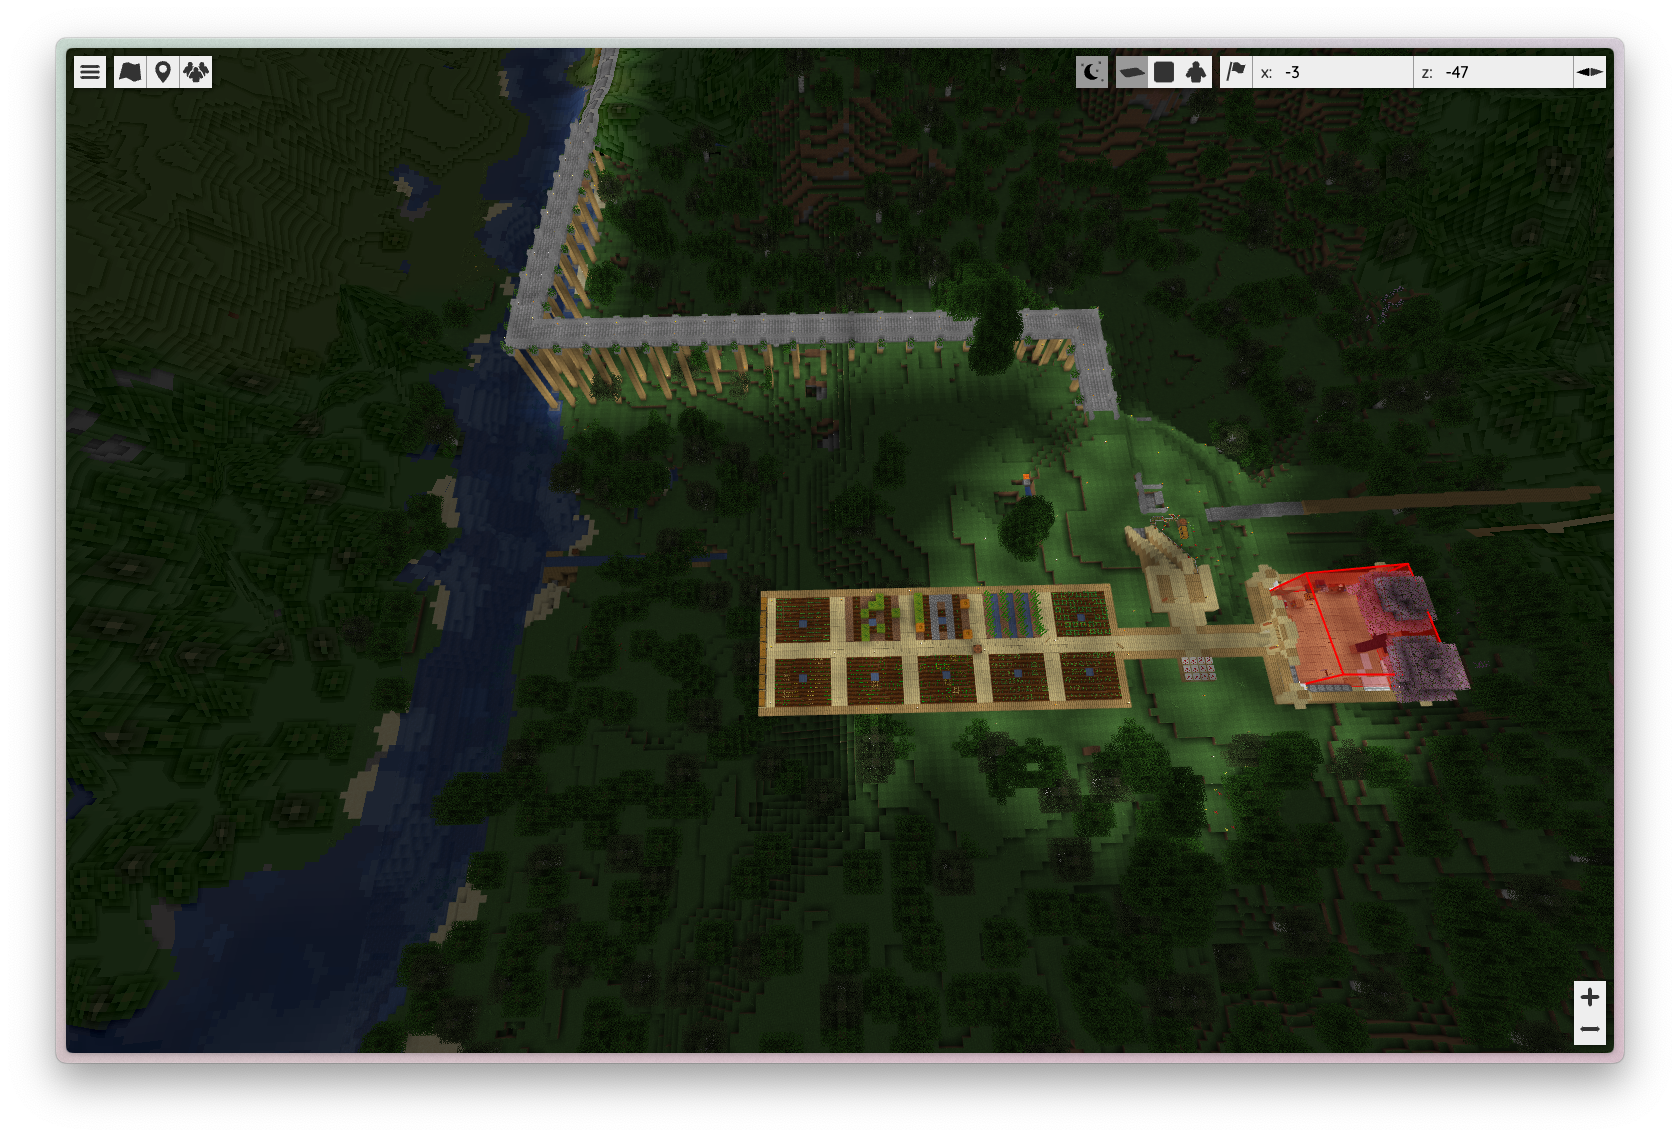
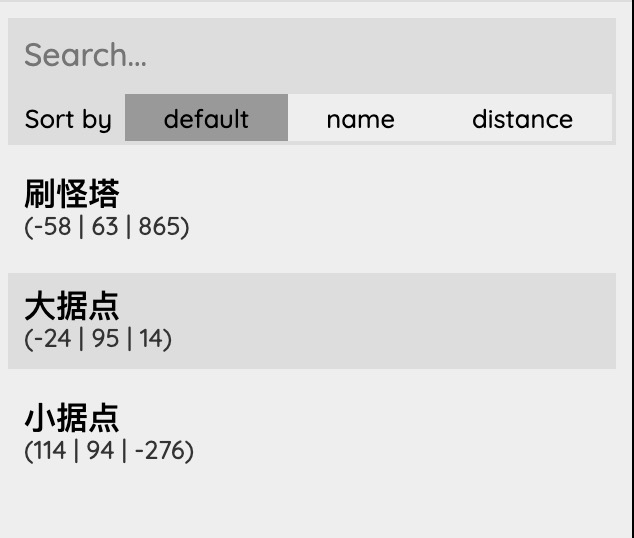
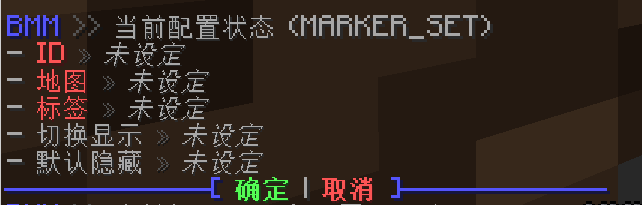
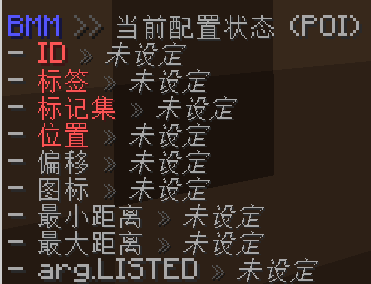
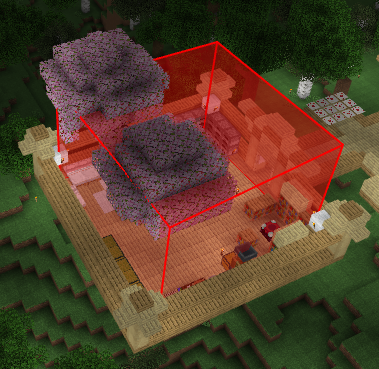
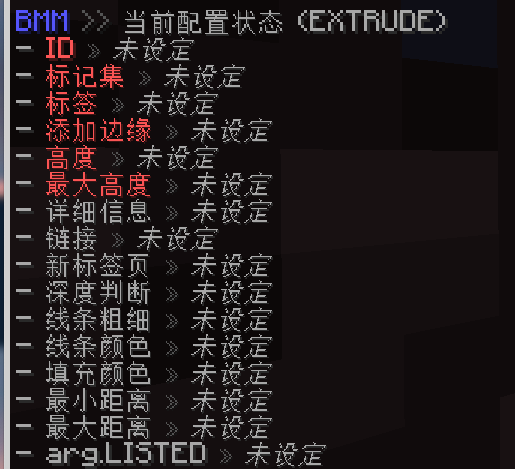
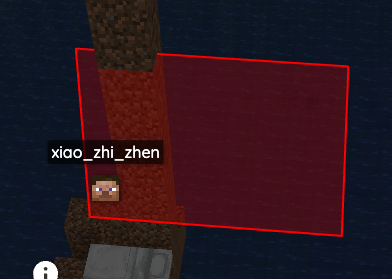
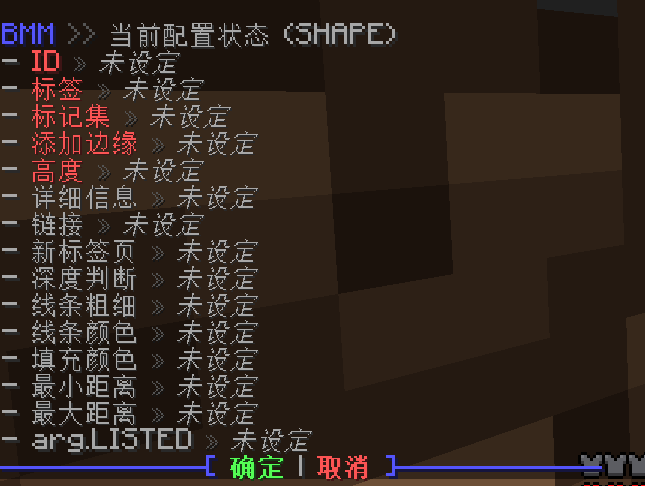
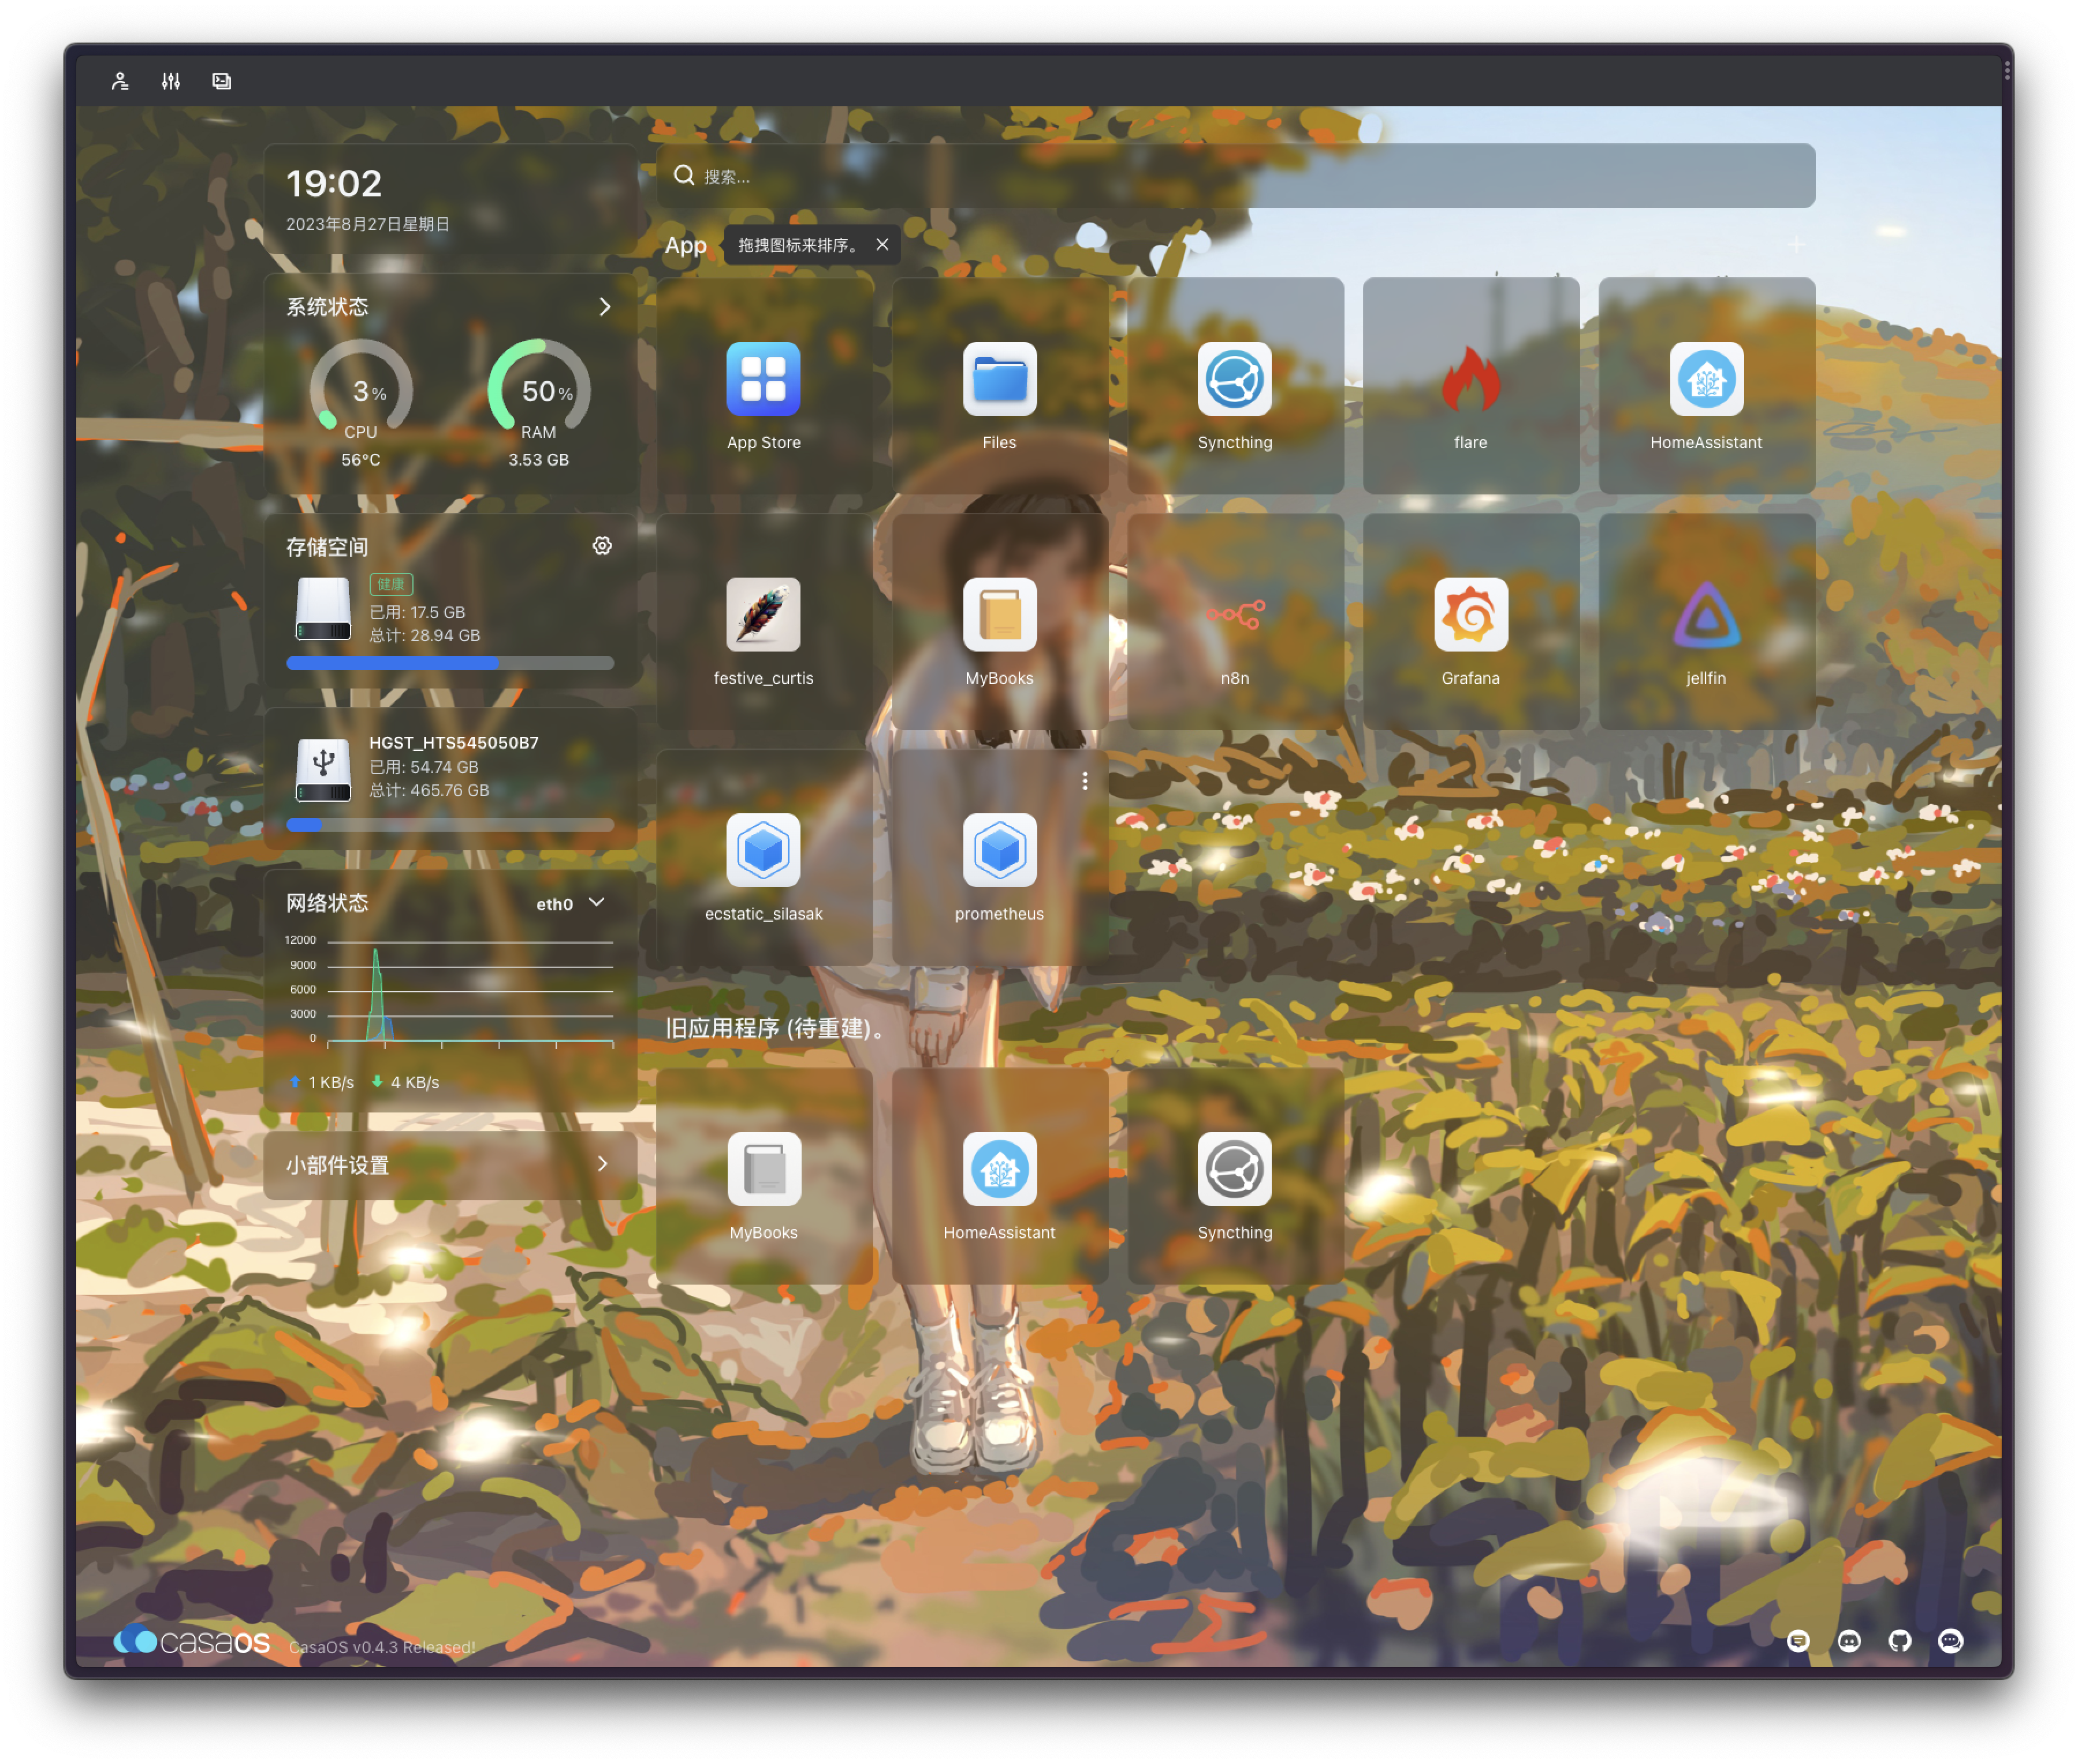
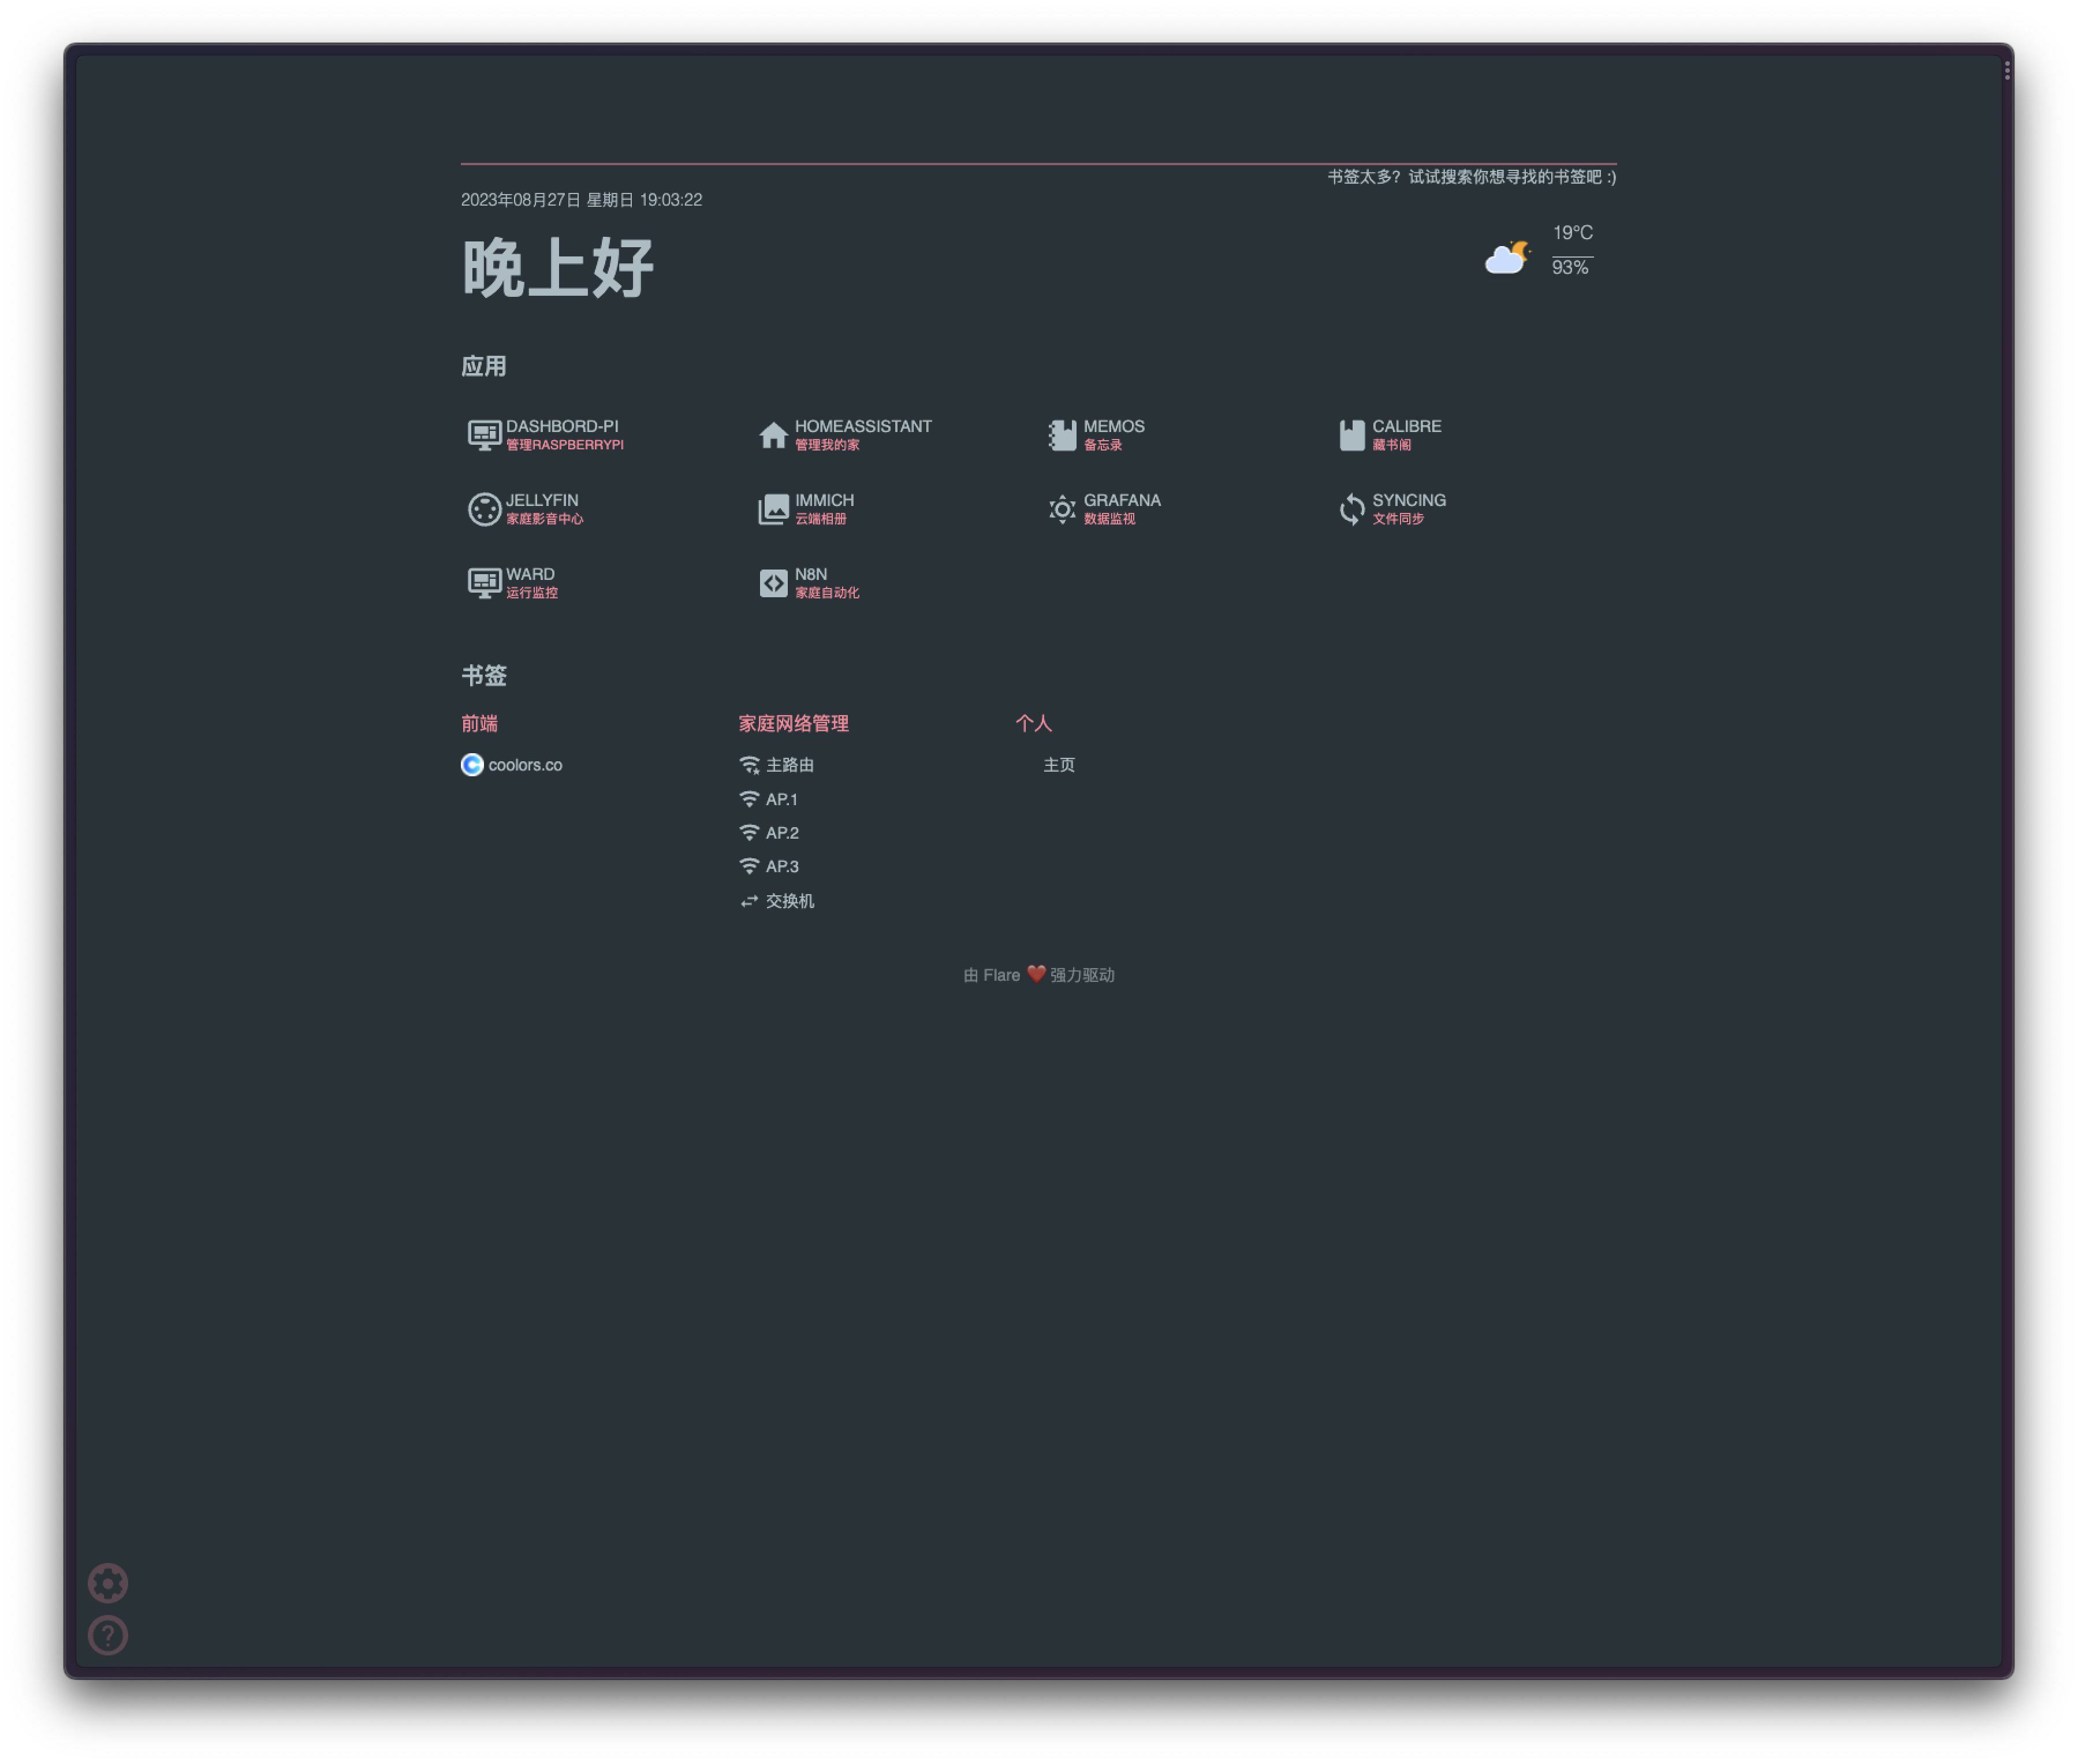
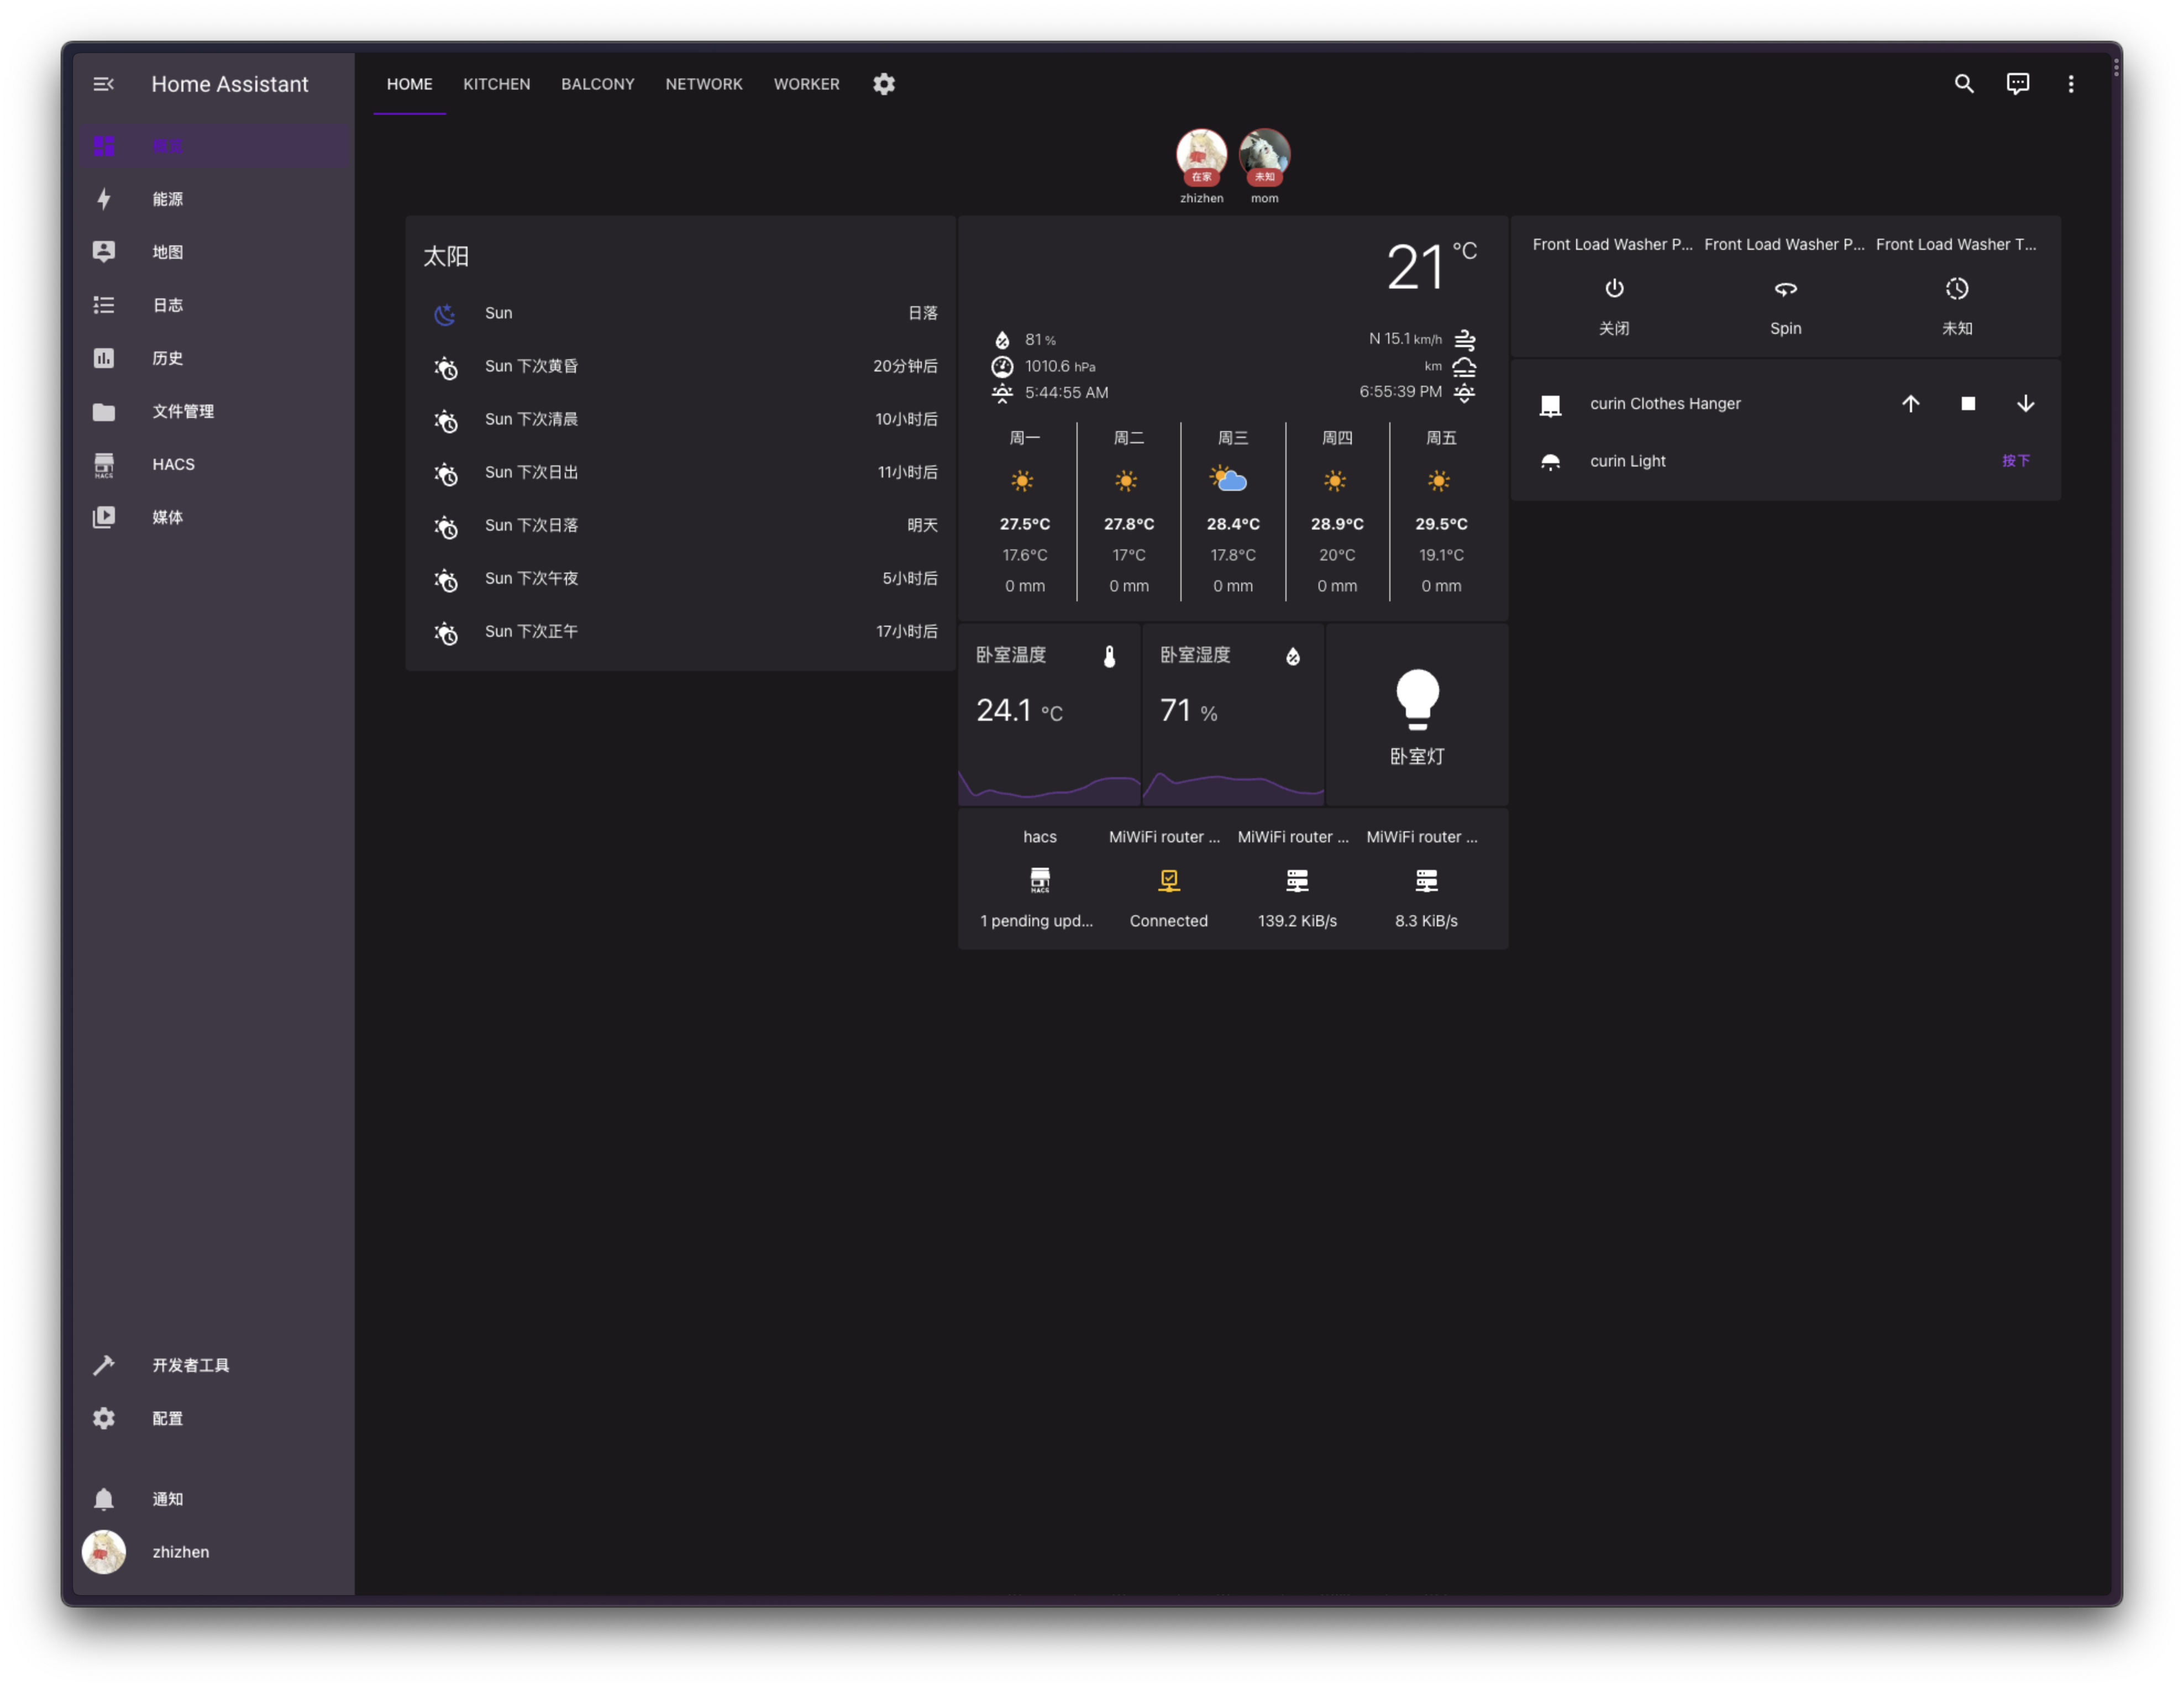
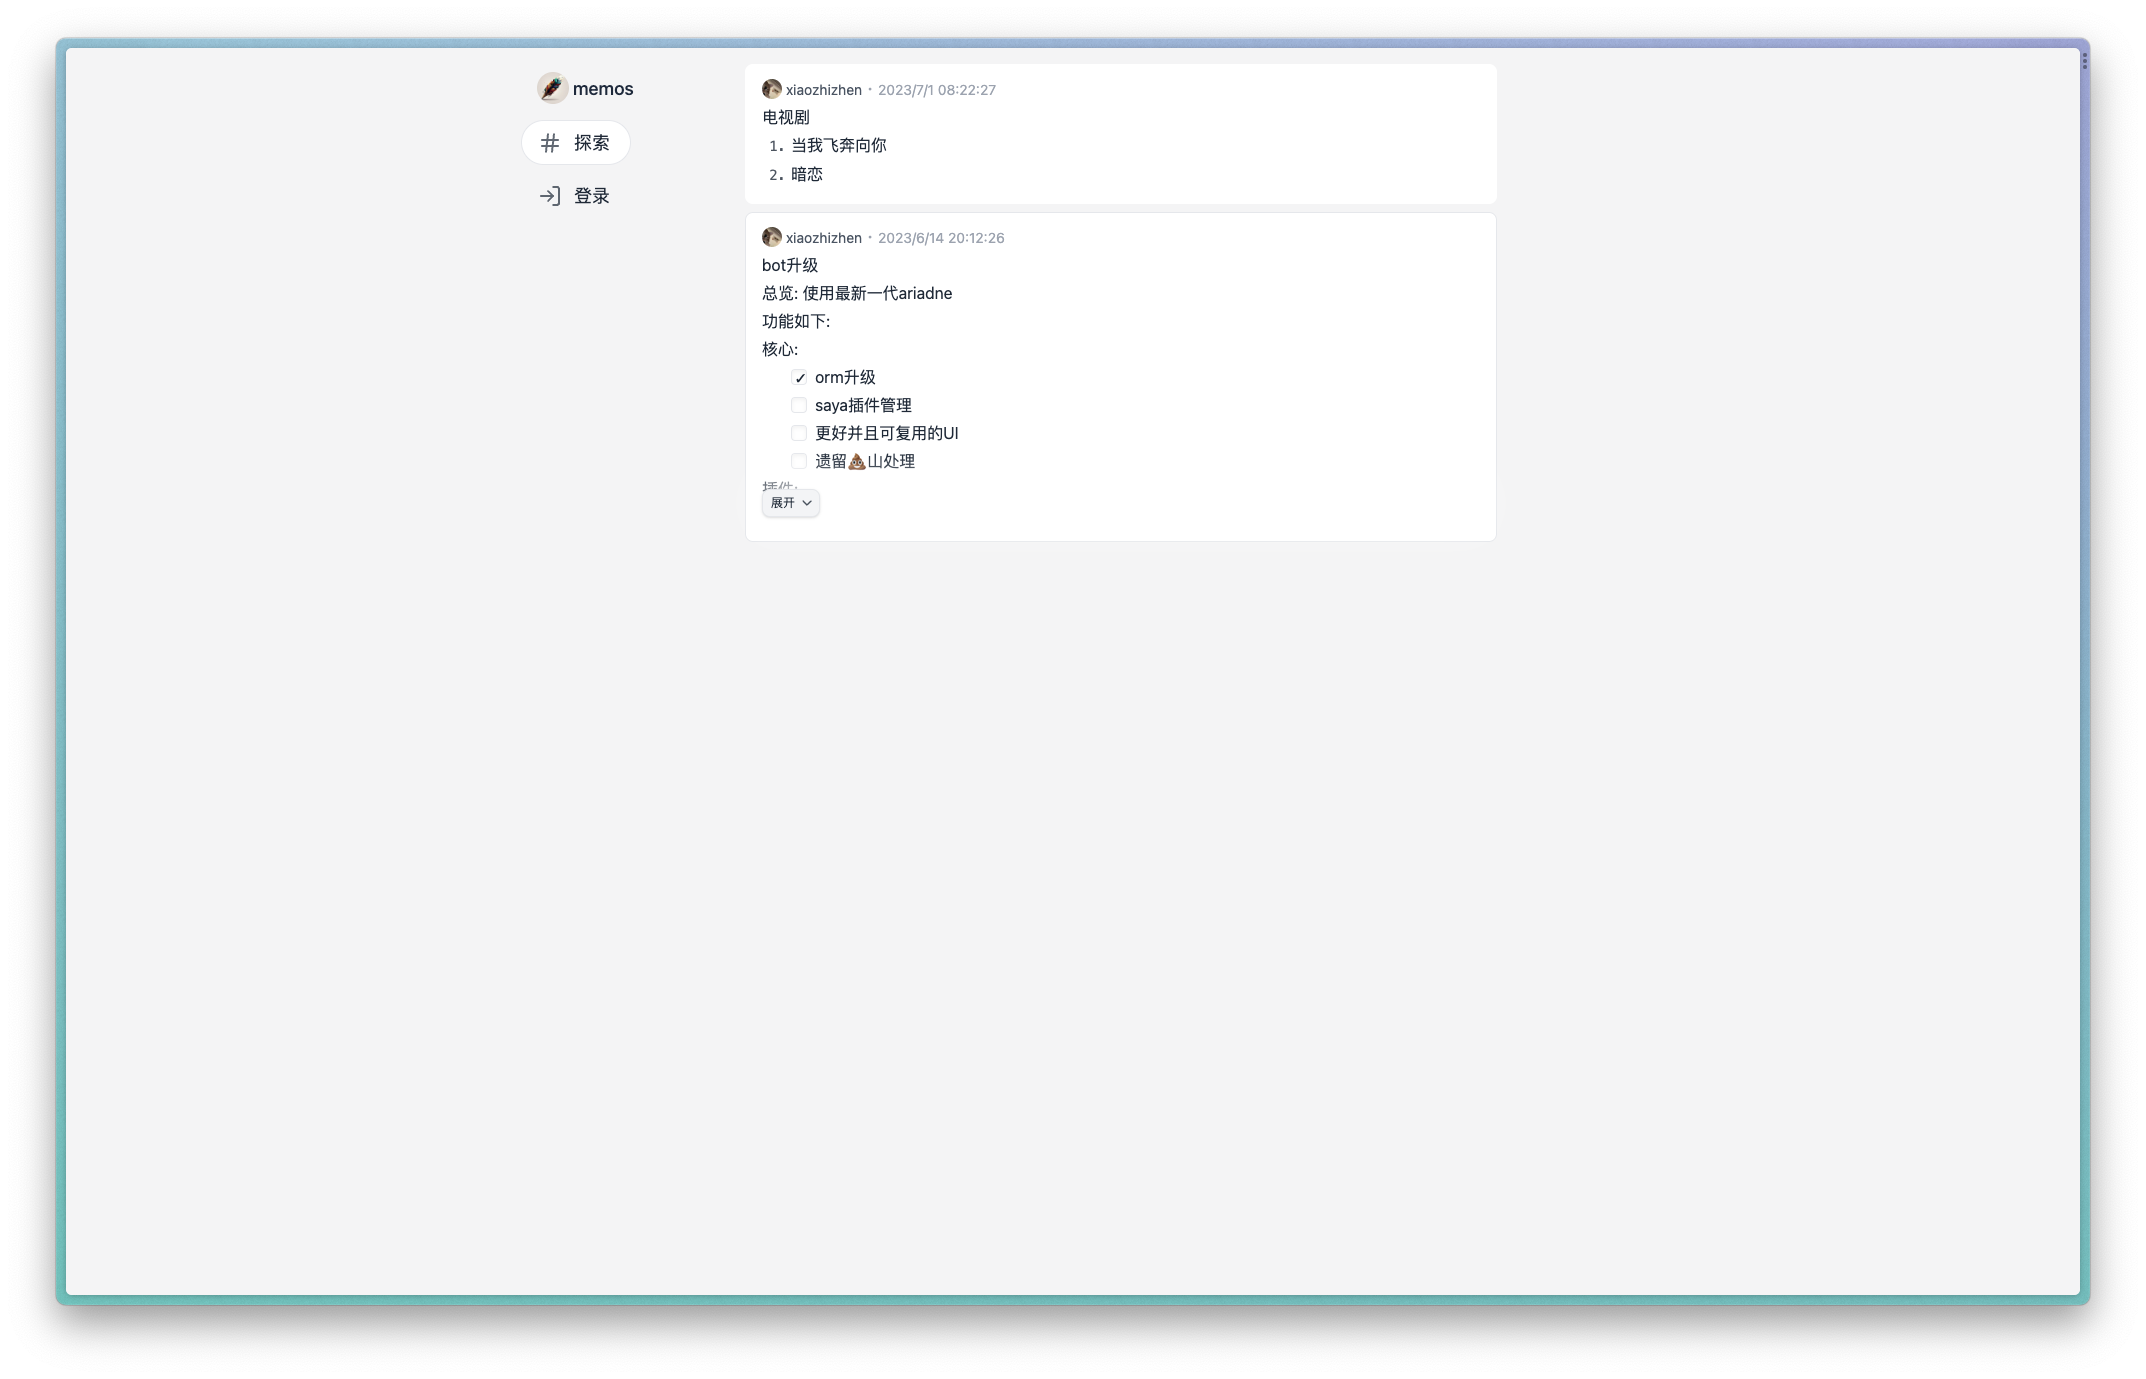
      <![CDATA[<p>如何使用 BlueMap, 以及如何在游戏内标点，显示在网页地图 (BlueMap) 上</p><span id="more"></span><h2 id="BlueMap-网页端使用"><a href="#BlueMap-网页端使用" class="headerlink" title="BlueMap 网页端使用"></a>BlueMap 网页端使用</h2><p>开头现先补个 BlueMap 使用教程.</p><p><img src="/posts/4e801b18/BlueMap.jpg" alt="BlueMap 网页端"></p><p>这就是 BlueMap 的网页端了.</p><h3 id="基本操作"><a href="#基本操作" class="headerlink" title="基本操作"></a>基本操作</h3><p>这里我直接 po 一张 BlueMap 官方给出的操作图.</p><p><img src="/posts/4e801b18/Basic-Operation.jpg" alt="基本操作"></p><h3 id="菜单"><a href="#菜单" class="headerlink" title="菜单"></a>菜单</h3><p>在右上角第一个三个横杆标志点开后即是菜单了.</p><p><img src="/posts/4e801b18/Menu.jpg" alt="菜单"></p><p>在 <code>Settings</code> 中可以更改地图的设置和语言, 以下以中文作为演示语言.</p><h3 id="切换地图"><a href="#切换地图" class="headerlink" title="切换地图"></a>切换地图</h3><p>在右上角第二个地图标志点开后可以切换地图.</p><p><img src="/posts/4e801b18/MapChange.jpg" alt="地图切换"></p><p>在原版中应该会出现三个选项(如下图), 依次是 主世界(不带任何后缀), 地狱(<strong>_Nether), 末地(</strong>_End).</p><p><img src="/posts/4e801b18/Map.jpg" alt="地图"></p><h3 id="标记组与标记"><a href="#标记组与标记" class="headerlink" title="标记组与标记"></a>标记组与标记</h3><p>在右上角第三个定位标志点开后可以设置标记组显示和查看标记坐标.</p><p><img src="/posts/4e801b18/Marker-set-Markers.jpg" alt="标记组与标记"></p><p>点开后可以看到当前地图上的标记组, 右侧的开关可以切换标记组中的所有标记显示与否.</p><p><img src="/posts/4e801b18/Marker-set.jpg" alt="标记组"></p><p>点击标记组右侧的箭头后即可显示该标记组下的所有标记, 各个标记下均有其坐标.</p><p><img src="/posts/4e801b18/Marker.jpg" alt="标记"></p><h3 id="玩家"><a href="#玩家" class="headerlink" title="玩家"></a>玩家</h3><p>在右上角第三个团队标志点开后可以显示在线玩家和所处坐标.</p><p><img src="/posts/4e801b18/Players.jpg" alt="玩家"></p><h3 id="日间-夜间模式"><a href="#日间-夜间模式" class="headerlink" title="日间&#x2F;夜间模式"></a>日间&#x2F;夜间模式</h3><p>右上的第一个按钮可切换日夜效果</p><p><img src="/posts/4e801b18/Day_Night.jpg" alt="日/夜模式"></p><p><img src="/posts/4e801b18/Day.jpg" alt="日间模式"></p><p><img src="/posts/4e801b18/Night.jpg" alt="夜间模式"></p><h3 id="预览模式切换"><a href="#预览模式切换" class="headerlink" title="预览模式切换"></a>预览模式切换</h3><p>右上的接下来三个按钮用来切换预览模式, 从左到右依次是透视视野, 平坦视野, 自由视野.</p><h3 id="坐标显示"><a href="#坐标显示" class="headerlink" title="坐标显示"></a>坐标显示</h3><p>右上角的最后一个部分用以显示垂直方向上的 X, Z坐标， 旗帜按钮可以回到一开始的视野, 指南针按钮可以重设方位.</p><p>单击某个方块, 即可显示某个方块的坐标.</p><h2 id="BlueMap-Marker-Manager插件使用"><a href="#BlueMap-Marker-Manager插件使用" class="headerlink" title="BlueMap Marker Manager插件使用"></a>BlueMap Marker Manager插件使用</h2><p>相比于其他的MC网页地图, 我们使用的 <a href="https://github.com/MiraculixxT/bluemap-marker">BlueMap Marker Manager</a> 一大优势是减少了玩家手动输入指令的需求.即使你不会MC指令, 大概率也能学会本教程. 很多别的模组生成标记基本全靠手硬敲.</p><h3 id="基本概念"><a href="#基本概念" class="headerlink" title="基本概念"></a>基本概念</h3><h4 id="标记与标记组"><a href="#标记与标记组" class="headerlink" title="标记与标记组"></a>标记与标记组</h4><p>标记是地图上的一个点&#x2F;线&#x2F;面，标记组是标记的集合。</p><p>标记 <code>marker</code> 与标记组 <code>marker set</code> 的关系类似与学生和班级。地图上显示的标记不能单独存在，背后必须隶属于某个组。这样我们根据功能、位置等能给不同的标记分组，方便管理。</p><p>在网页中显示如下:</p><p><img src="/posts/4e801b18/Marker-set.jpg" alt="标记组"></p><p><img src="/posts/4e801b18/Markers.jpg" alt="标记"></p><p>所以标记和标记组之间是有含义上的联系, <strong><code>不要将标记随便塞进一个组</code></strong>, 这样很不方便区分和管理.</p><h4 id="标记与标记组的所包含的基本数据"><a href="#标记与标记组的所包含的基本数据" class="headerlink" title="标记与标记组的所包含的基本数据"></a>标记与标记组的所包含的基本数据</h4><p>这里了解后, 在 BMM 插件里只是拿鼠标点点的事.</p><h5 id="标记组所需数据"><a href="#标记组所需数据" class="headerlink" title="标记组所需数据"></a>标记组所需数据</h5><ul><li>ID: 用于标记组的唯一标识符, 用于区分不同的标记组, 不能重复.它不会在网络地图中显示出来, 但这是 BlueMap 和我们在游戏中找到这个标记组的唯一方法, 所以不要用一些没有意义的字符, 不方便管理. 其只能是英文、数字和短横线、下划线.</li><li>地图 (Map): 此组存在于哪张地图, 如主世界, 下界 <code>Nether</code>、末地 <code>End</code>.</li><li>标签 (Label): 组在网页中显示名称, 可以是中文，方便辨识.</li></ul><h5 id="标记所需数据"><a href="#标记所需数据" class="headerlink" title="标记所需数据"></a>标记所需数据</h5><ul><li>ID: 用于标记的唯一标识符, 用于区分不同的标记, 不能重复.它不会在网络地图中显示出来, 但这是 BlueMap 和我们在游戏中找到这个标记组的唯一方法, 所以不要用一些没有意义的字符, 不方便管理. 其只能是英文、数字和短横线、下划线.</li><li>标签 (Label): 组在网页中显示名称, 可以是中文，方便辨识.</li><li>标记集 (Marker Set): 即标记组, 用以表示其隶属于哪个标记组.</li><li>位置 (Position): 标记的XYZ位置. 如果是单个标记点是一个位置, 如果是几何图形标记的区域则需要多个位置复杂一些.</li></ul><h3 id="游戏实操"><a href="#游戏实操" class="headerlink" title="游戏实操"></a>游戏实操</h3><h4 id="创建一个标记组"><a href="#创建一个标记组" class="headerlink" title="创建一个标记组"></a>创建一个标记组</h4><p>在游戏内按 <code>T</code> 键输入指令 <code>/bmarker set-create</code></p><p>之后会显示出来一个菜单, 再次按 <code>/</code> 或 <code>t</code> 可以唤出鼠标. 用鼠标点依次三个红色必填项, 在给出的命令后方根据上面写的要求输入, 注意别把前面已经帮你写好的命令删了. 下面的灰色项为选填，可以自行多研究, 这里不多赘述, 如果不清楚就不要动即可.</p><p><img src="/posts/4e801b18/Marker-set-create.jpg" alt="创建标记组"></p><p>按照上面基本概念填入信息即可.</p><h4 id="创建标记"><a href="#创建标记" class="headerlink" title="创建标记"></a>创建标记</h4><p>在游戏内按 <code>/</code> 键输入指令 <code>/bmarker create</code> 再空格会显示多种标记类型. 比如<code>poi</code>(点), <code>ellipse</code>(椭圆), <code>line</code>(折线), <code>shape</code>(平面), <code>extrude</code>(多边形).下面我们来介绍几个比较常用的类型.</p><h5 id="poi"><a href="#poi" class="headerlink" title="poi"></a>poi</h5><p><img src="/posts/4e801b18/POI.jpg" alt="点"></p><p>在游戏内按 <code>/</code> 键输入指令 <code>/bmarker create poi</code>.</p><p>之后会显示出来一个菜单, 再次按 <code>/</code> 或 <code>t</code> 可以唤出鼠标.</p><p><img src="/posts/4e801b18/POI-create.jpg" alt="创建点"></p><p>前三项, 按照上面基本概念填入信息即可.<br>对于位置 填入 <code>~ ~ ~</code> 来代表脚踩方块的坐标.</p><h5 id="extrude"><a href="#extrude" class="headerlink" title="extrude"></a>extrude</h5><p><img src="/posts/4e801b18/Extrude.jpg" alt="多边形"></p><p>在游戏内按 <code>/</code> 键输入指令 <code>/bmarker create shape</code>.</p><p>之后会显示出来一个菜单, 再次按 <code>/</code> 或 <code>t</code> 可以唤出鼠标.</p><p><img src="/posts/4e801b18/Extrude-create.jpg" alt="创建多边形"></p><p>前三项, 按照上面基本概念填入信息即可.需要注意的是标记集填入的是标记组的 ID 而不是标记组的标签.</p><p>第四项, 多次按添加边缘来添加多边形顶点， 需要注意的是需要沿着多边形的边的顺序添加,否则该图形可能不是凸多边形.</p><p>第五项, 高度, 即底面所在的 Y 坐标.</p><p>第六项, 最大高度, 即顶面所在的 Y 坐标.</p><p>线条粗细(可选项), 是一个数值，以像素为单位</p><p>线条颜色(可选项), 即边的颜色, 需填入 R G B 三值, 用空格分隔, 0-255 之间的整数.</p><p>填充颜色(可选项), 即面的颜色, 需填入 R G B 三值, 用空格分隔, 0-255 之间的整数.最后一项为透明度, 0-1 之间的小数.</p><h5 id="shape"><a href="#shape" class="headerlink" title="shape"></a>shape</h5><p><img src="/posts/4e801b18/Shape.jpg" alt="平面"></p><p>在游戏内按 <code>/</code> 键输入指令 <code>/bmarker create shape</code>.</p><p>之后会显示出来一个菜单, 再次按 <code>/</code> 或 <code>t</code> 可以唤出鼠标.</p><p><img src="/posts/4e801b18/Shape-create.jpg" alt="创建平面"></p><p>前三项, 按照上面基本概念填入信息即可.需要注意的是标记集填入的是标记组的 ID 而不是标记组的标签.</p><p>第四项, 多次按添加边缘来添加平面顶点， 需要注意的是需要沿着平面的边的顺序添加,否则该平面可能不是凸平面.</p><p>第五项, 高度, 即面所在的 Y 坐标.</p><h4 id="修改与删除标记"><a href="#修改与删除标记" class="headerlink" title="修改与删除标记"></a>修改与删除标记</h4><ul><li>编辑现有的标记（比如改位置、改标签文字），菜单使用方法同上 <code>/bmarker edit &lt;地图名&gt; &lt;标记组ID&gt; &lt;标记ID&gt;</code></li><li>删除单个标记 <code>/bmarker delete &lt;地图名&gt; &lt;标记组ID&gt; &lt;标记ID&gt;</code></li><li>删除整个标记组（慎用，会让所有组内标记消失） <code>/bmarker set-delete &lt;地图名&gt; &lt;标记组ID&gt; true</code></li></ul>]]>
    </content>
    <id>https://blog.zenlydsp.top/posts/4e801b18/</id>
    <link href="https://blog.zenlydsp.top/posts/4e801b18/"/>
    <published>2026-09-26T06:37:30.000Z</published>
    <summary>
      <![CDATA[<p>如何使用 BlueMap, 以及如何在游戏内标点，显示在网页地图 (BlueMap) 上</p>]]>
    </summary>
    <title>BlueMap地图标记教程</title>
    <updated>2026-11-03T01:04:39.910Z</updated>
  </entry>
  <entry>
    <author>
      <name>Zenlydsp</name>
    </author>
    <category term="Network" scheme="https://blog.zenlydsp.top/tags/Network/"/>
    <category term="Docker" scheme="https://blog.zenlydsp.top/tags/Docker/"/>
    <category term="HomeProject" scheme="https://blog.zenlydsp.top/tags/HomeProject/"/>
    <content>
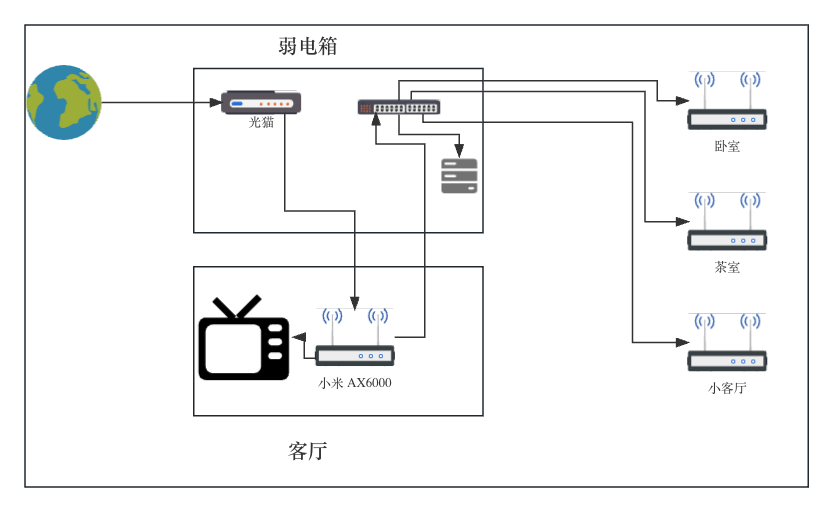
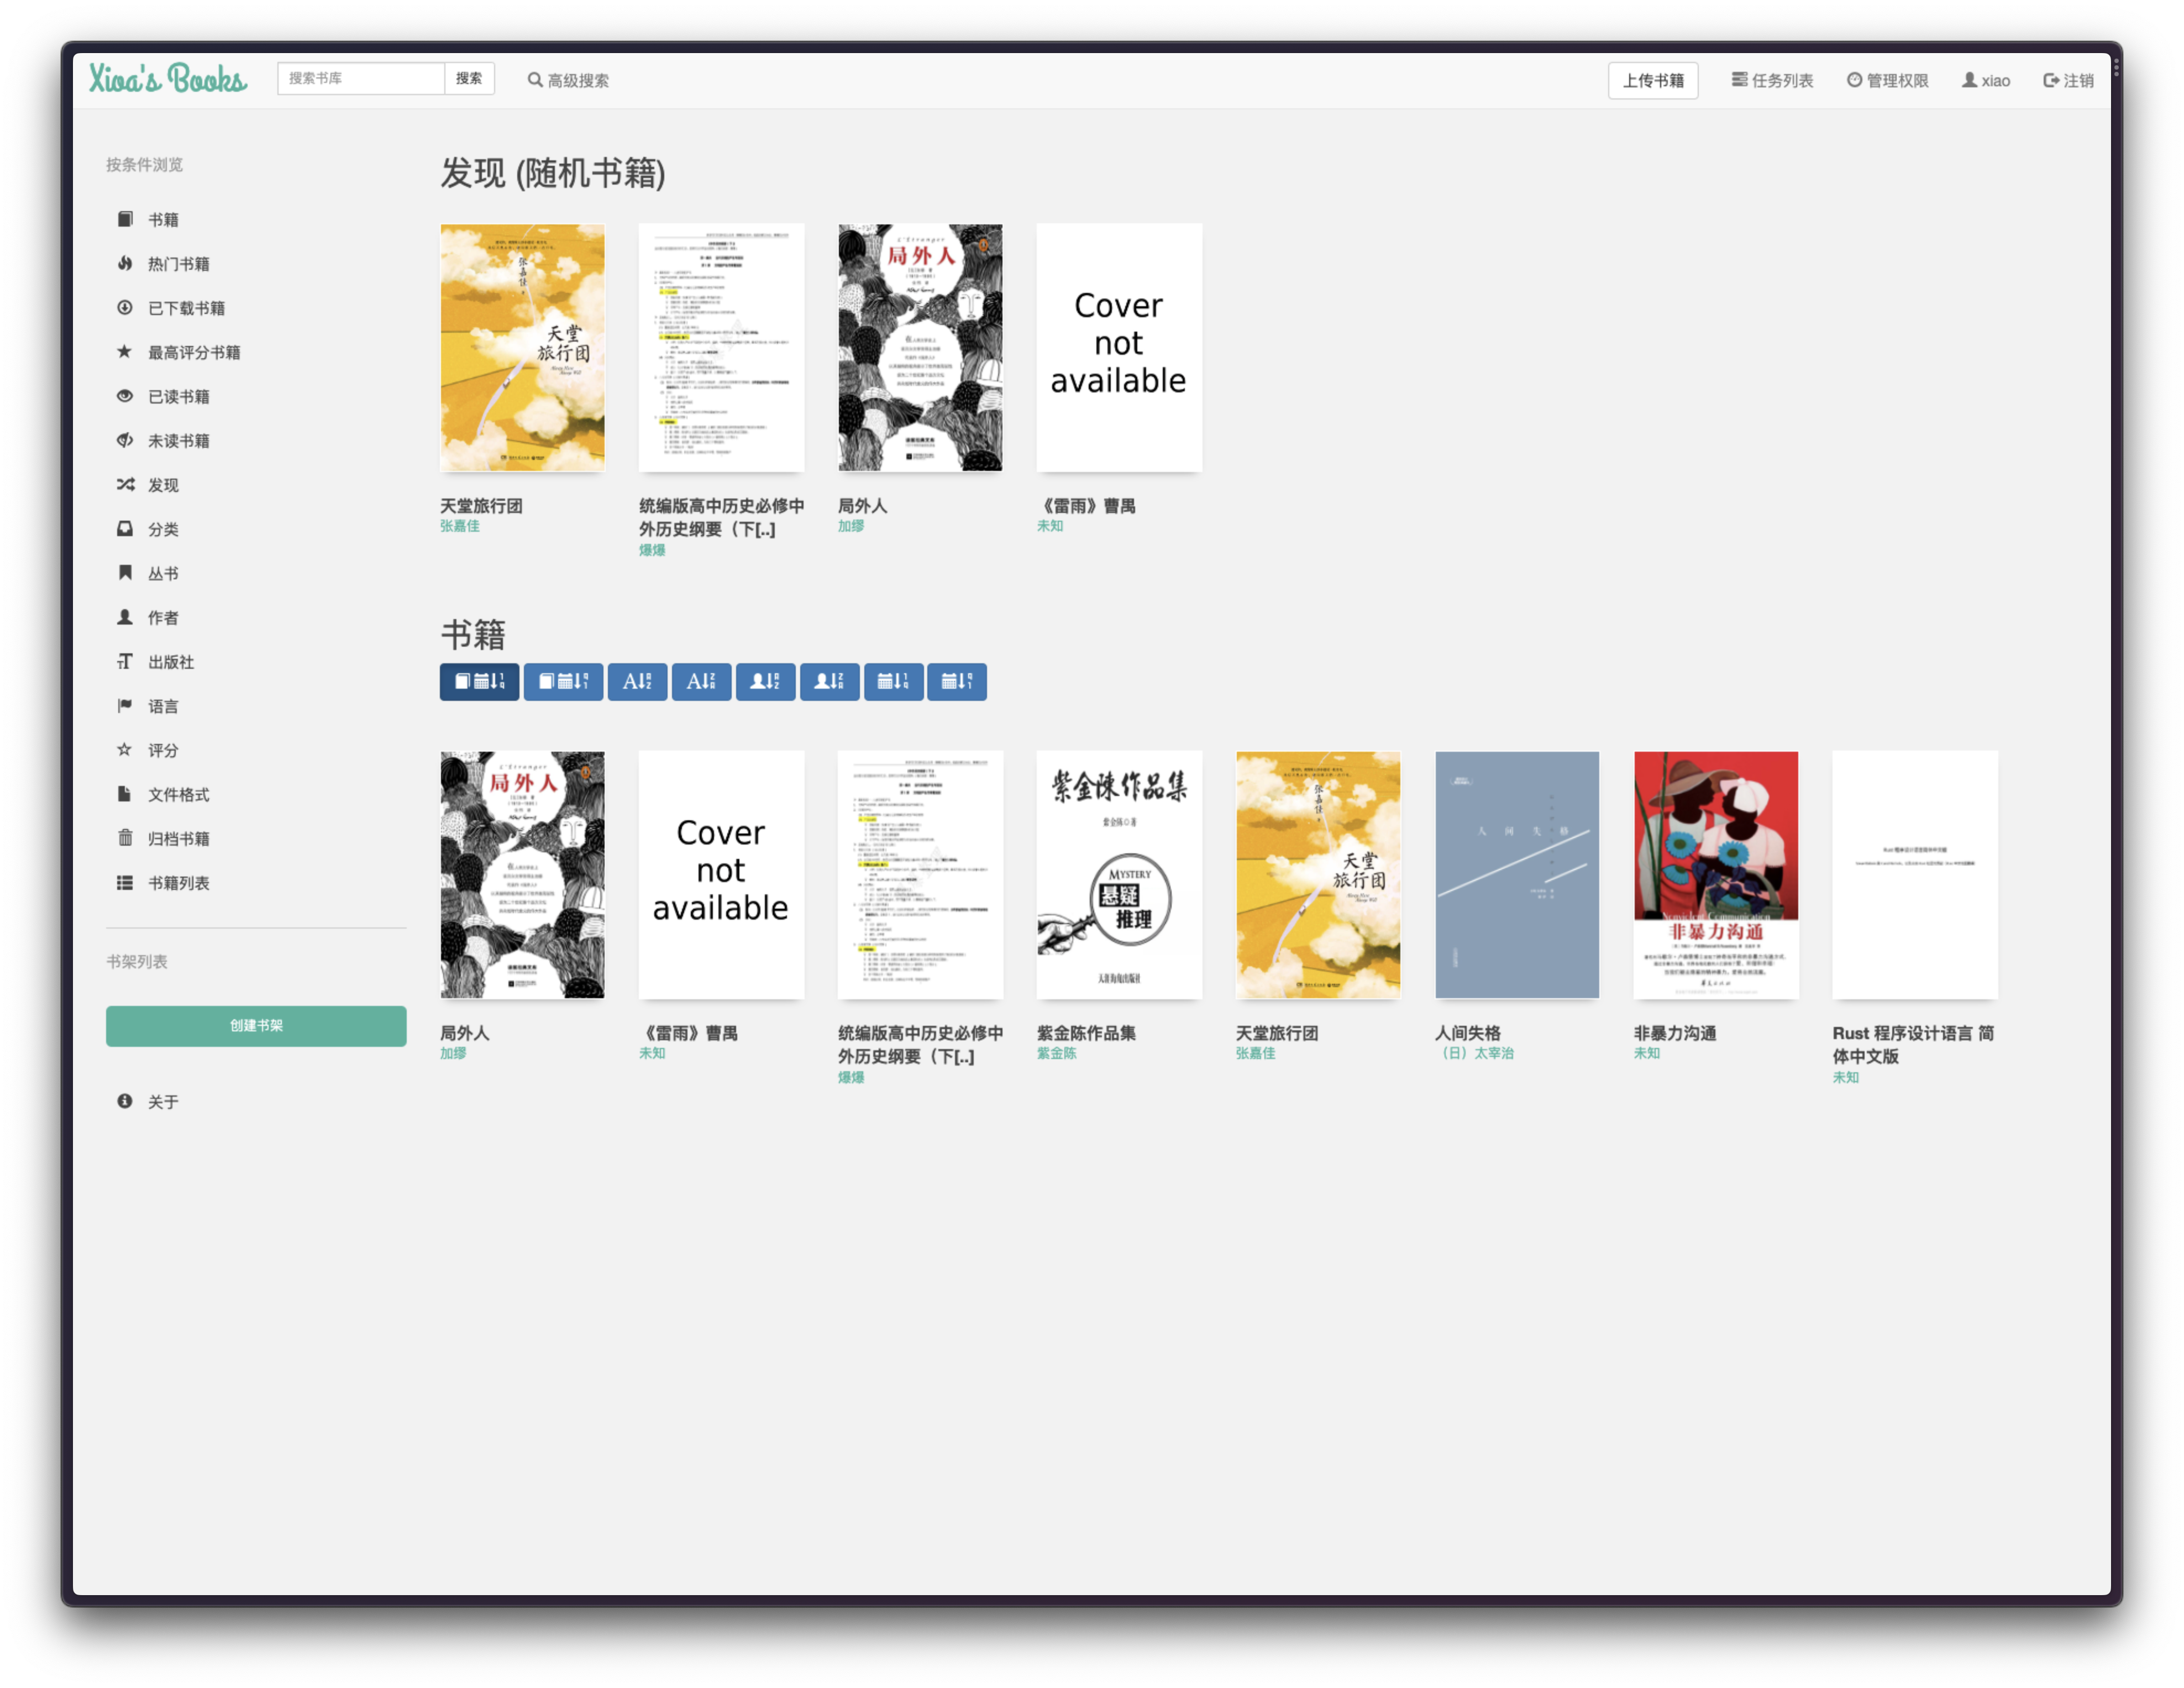
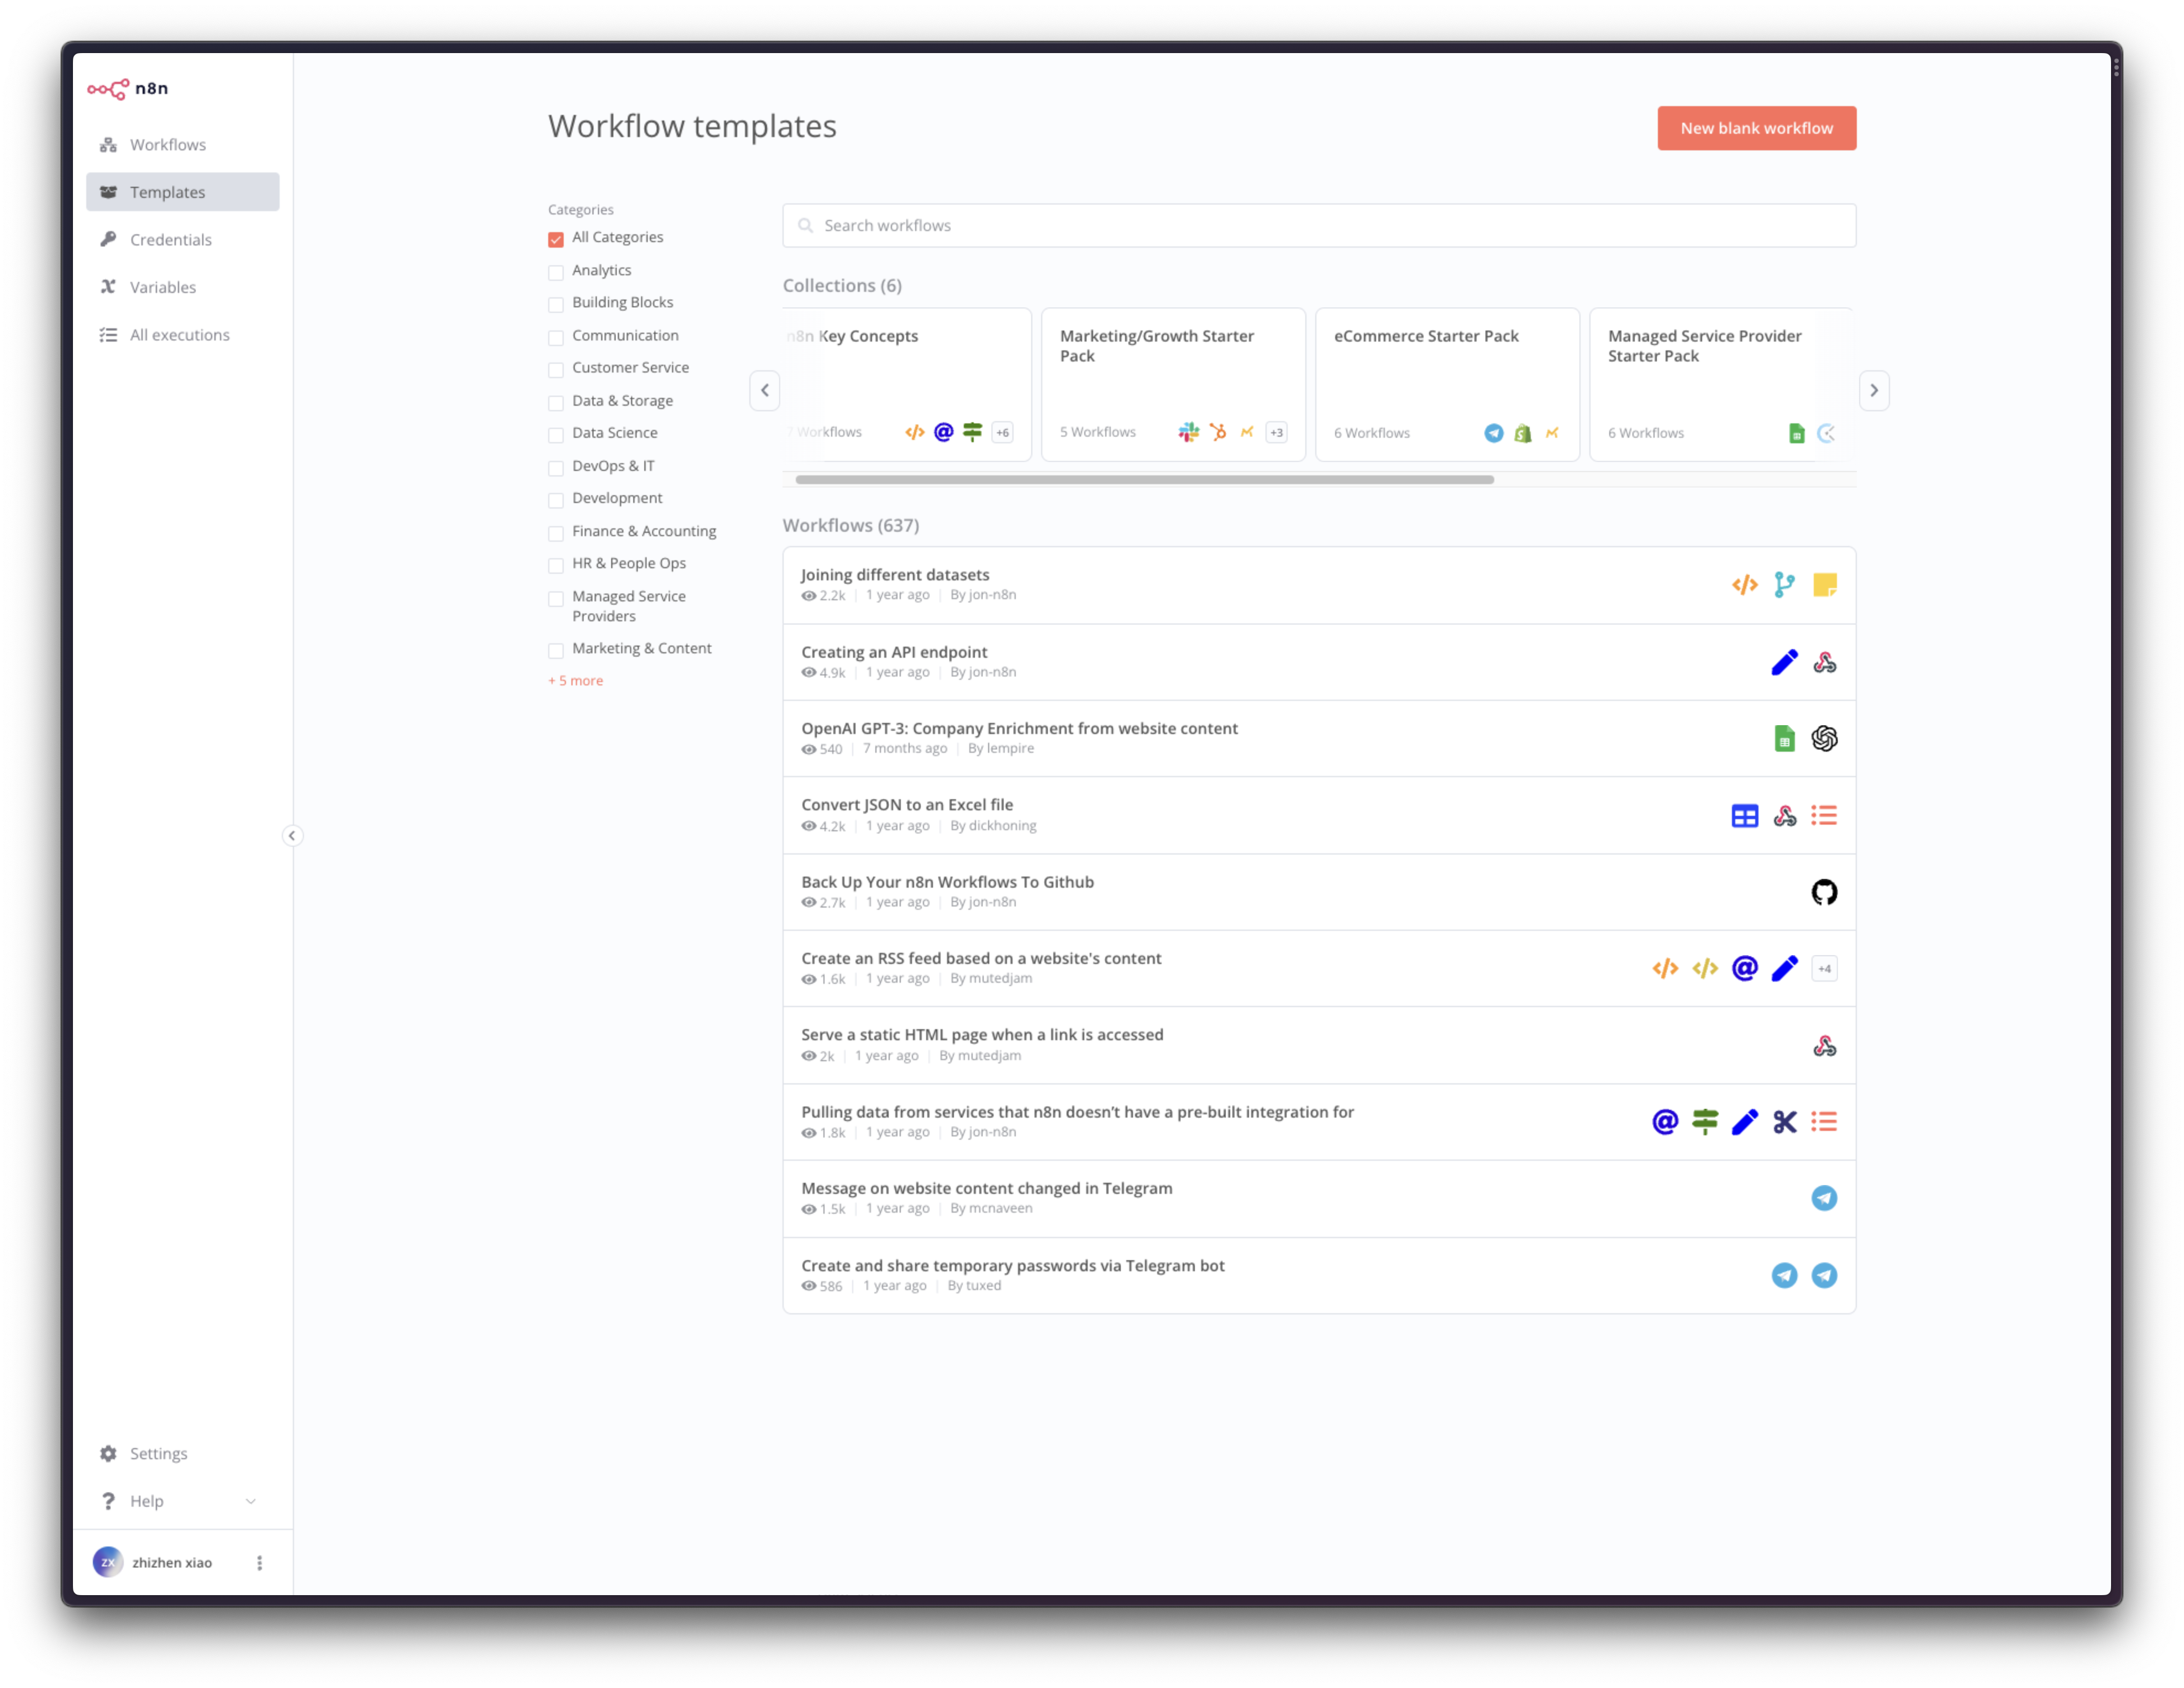
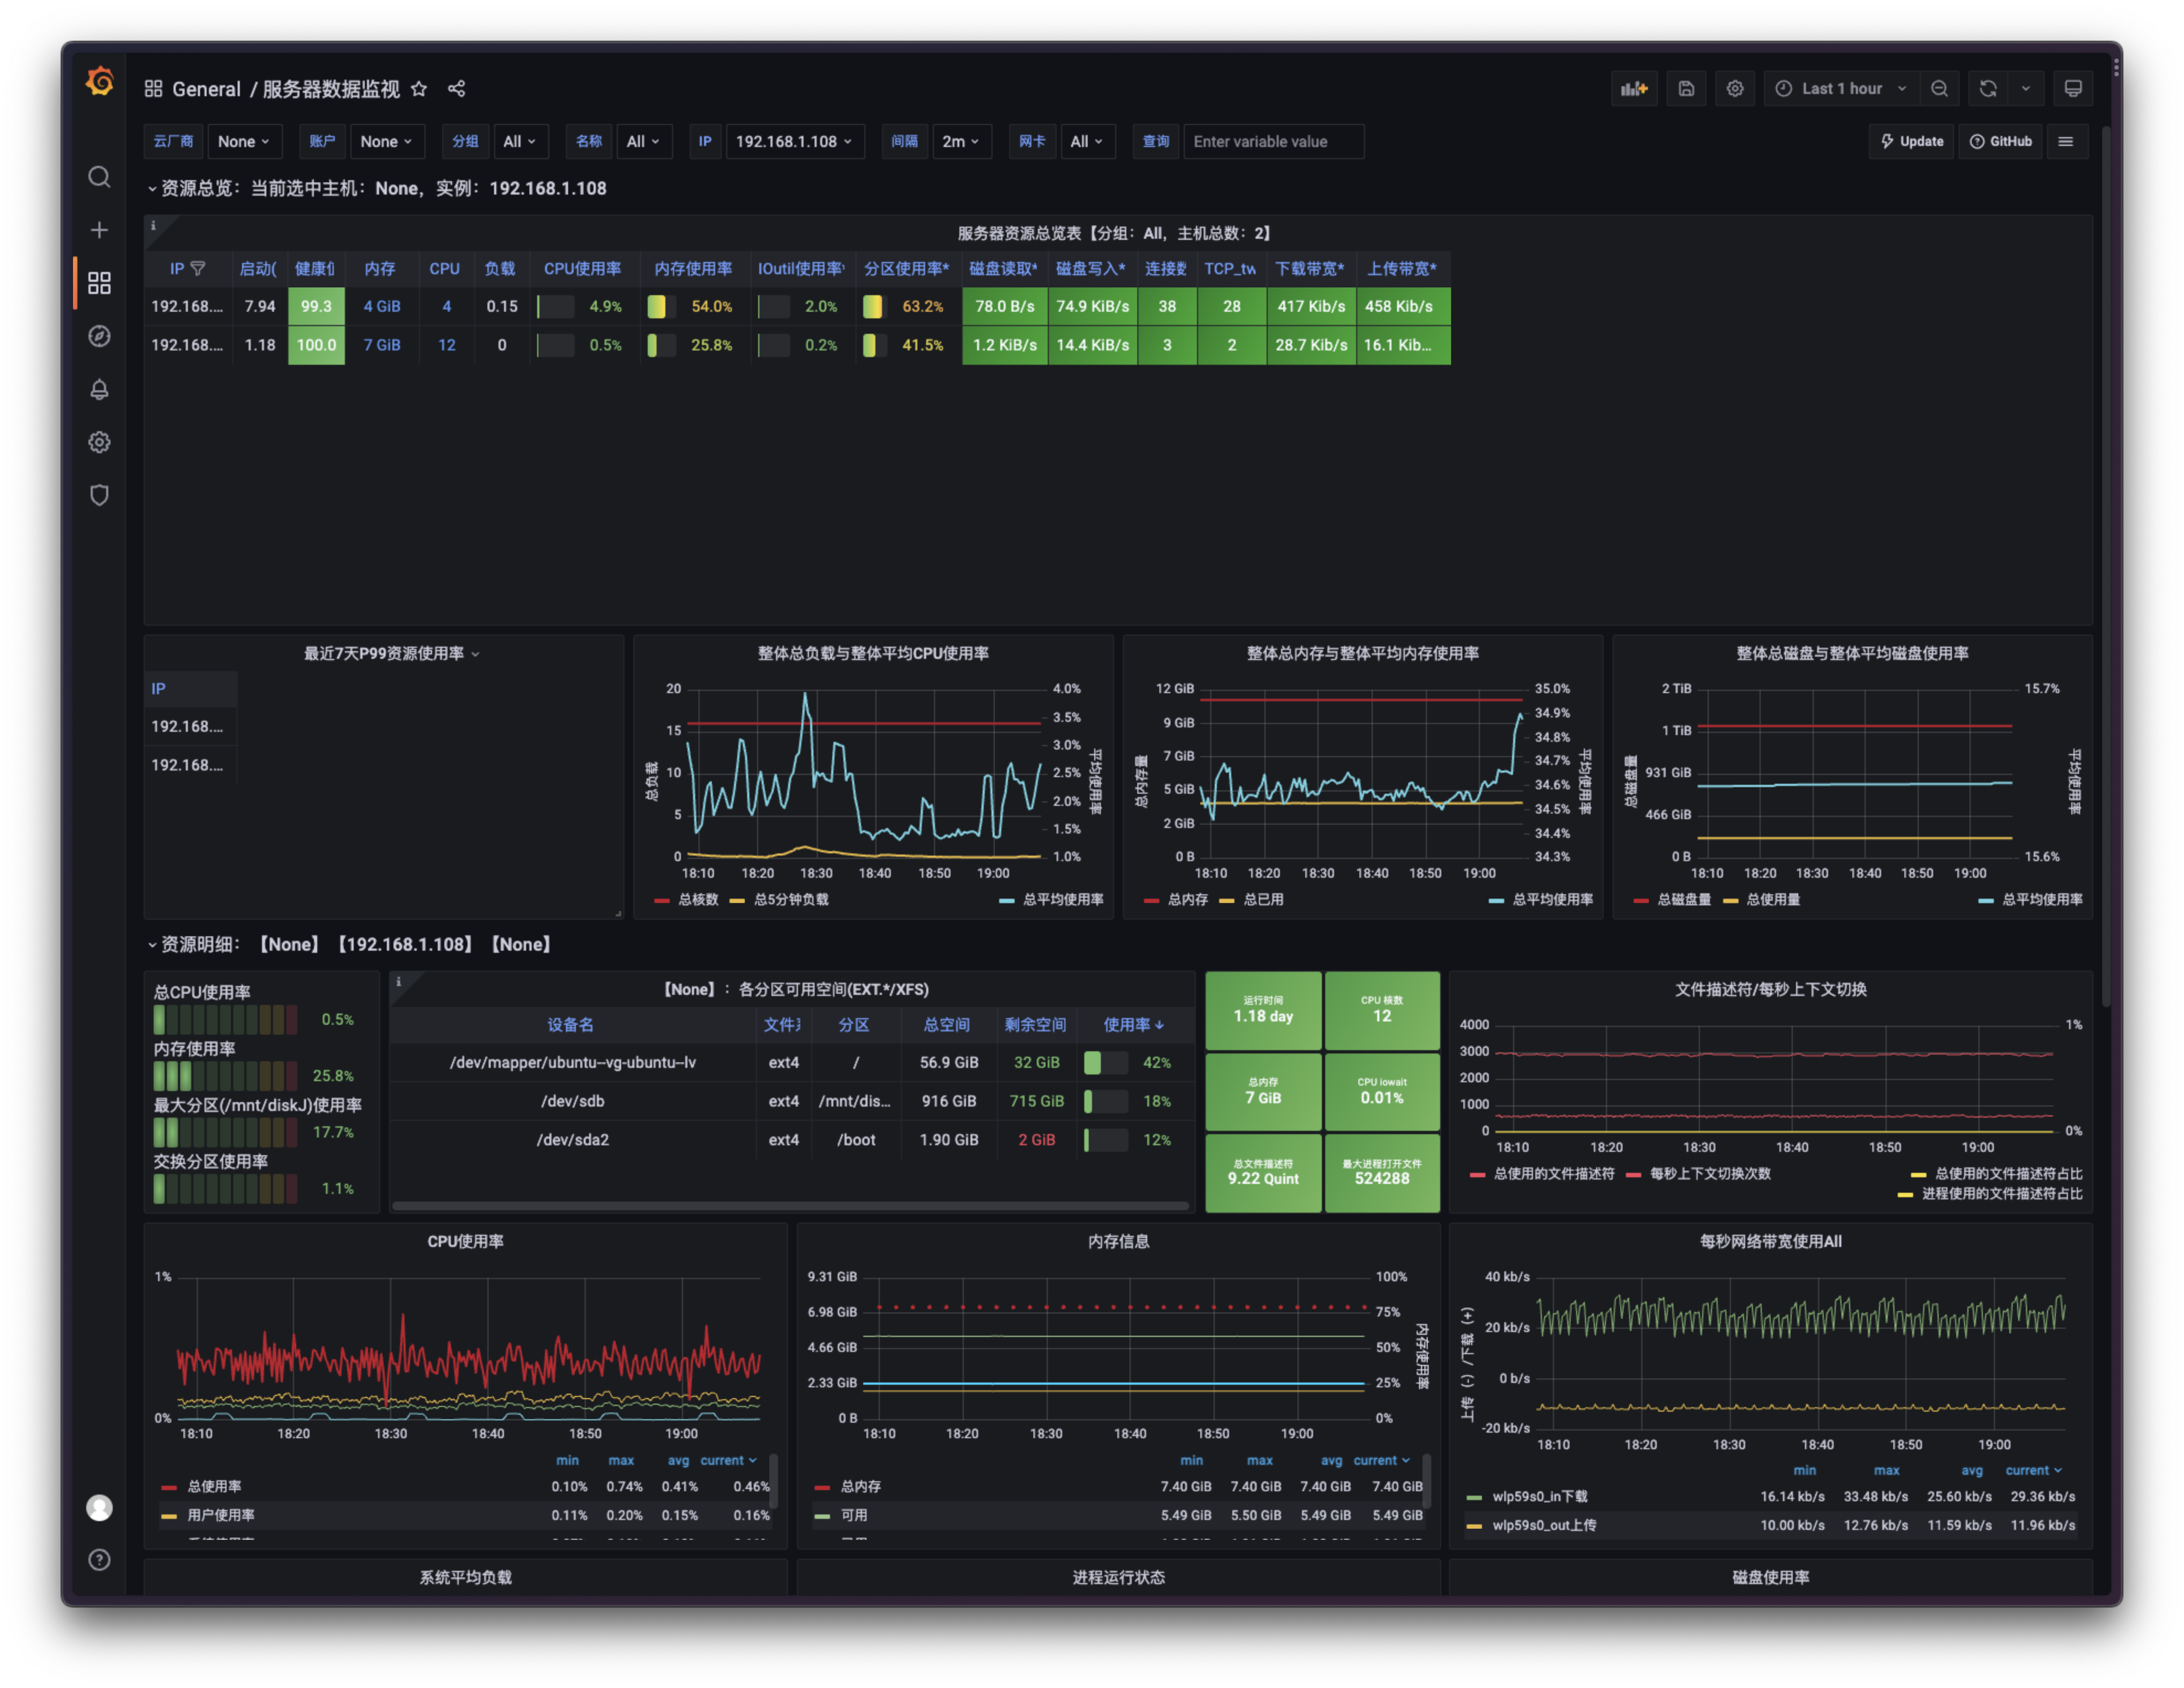
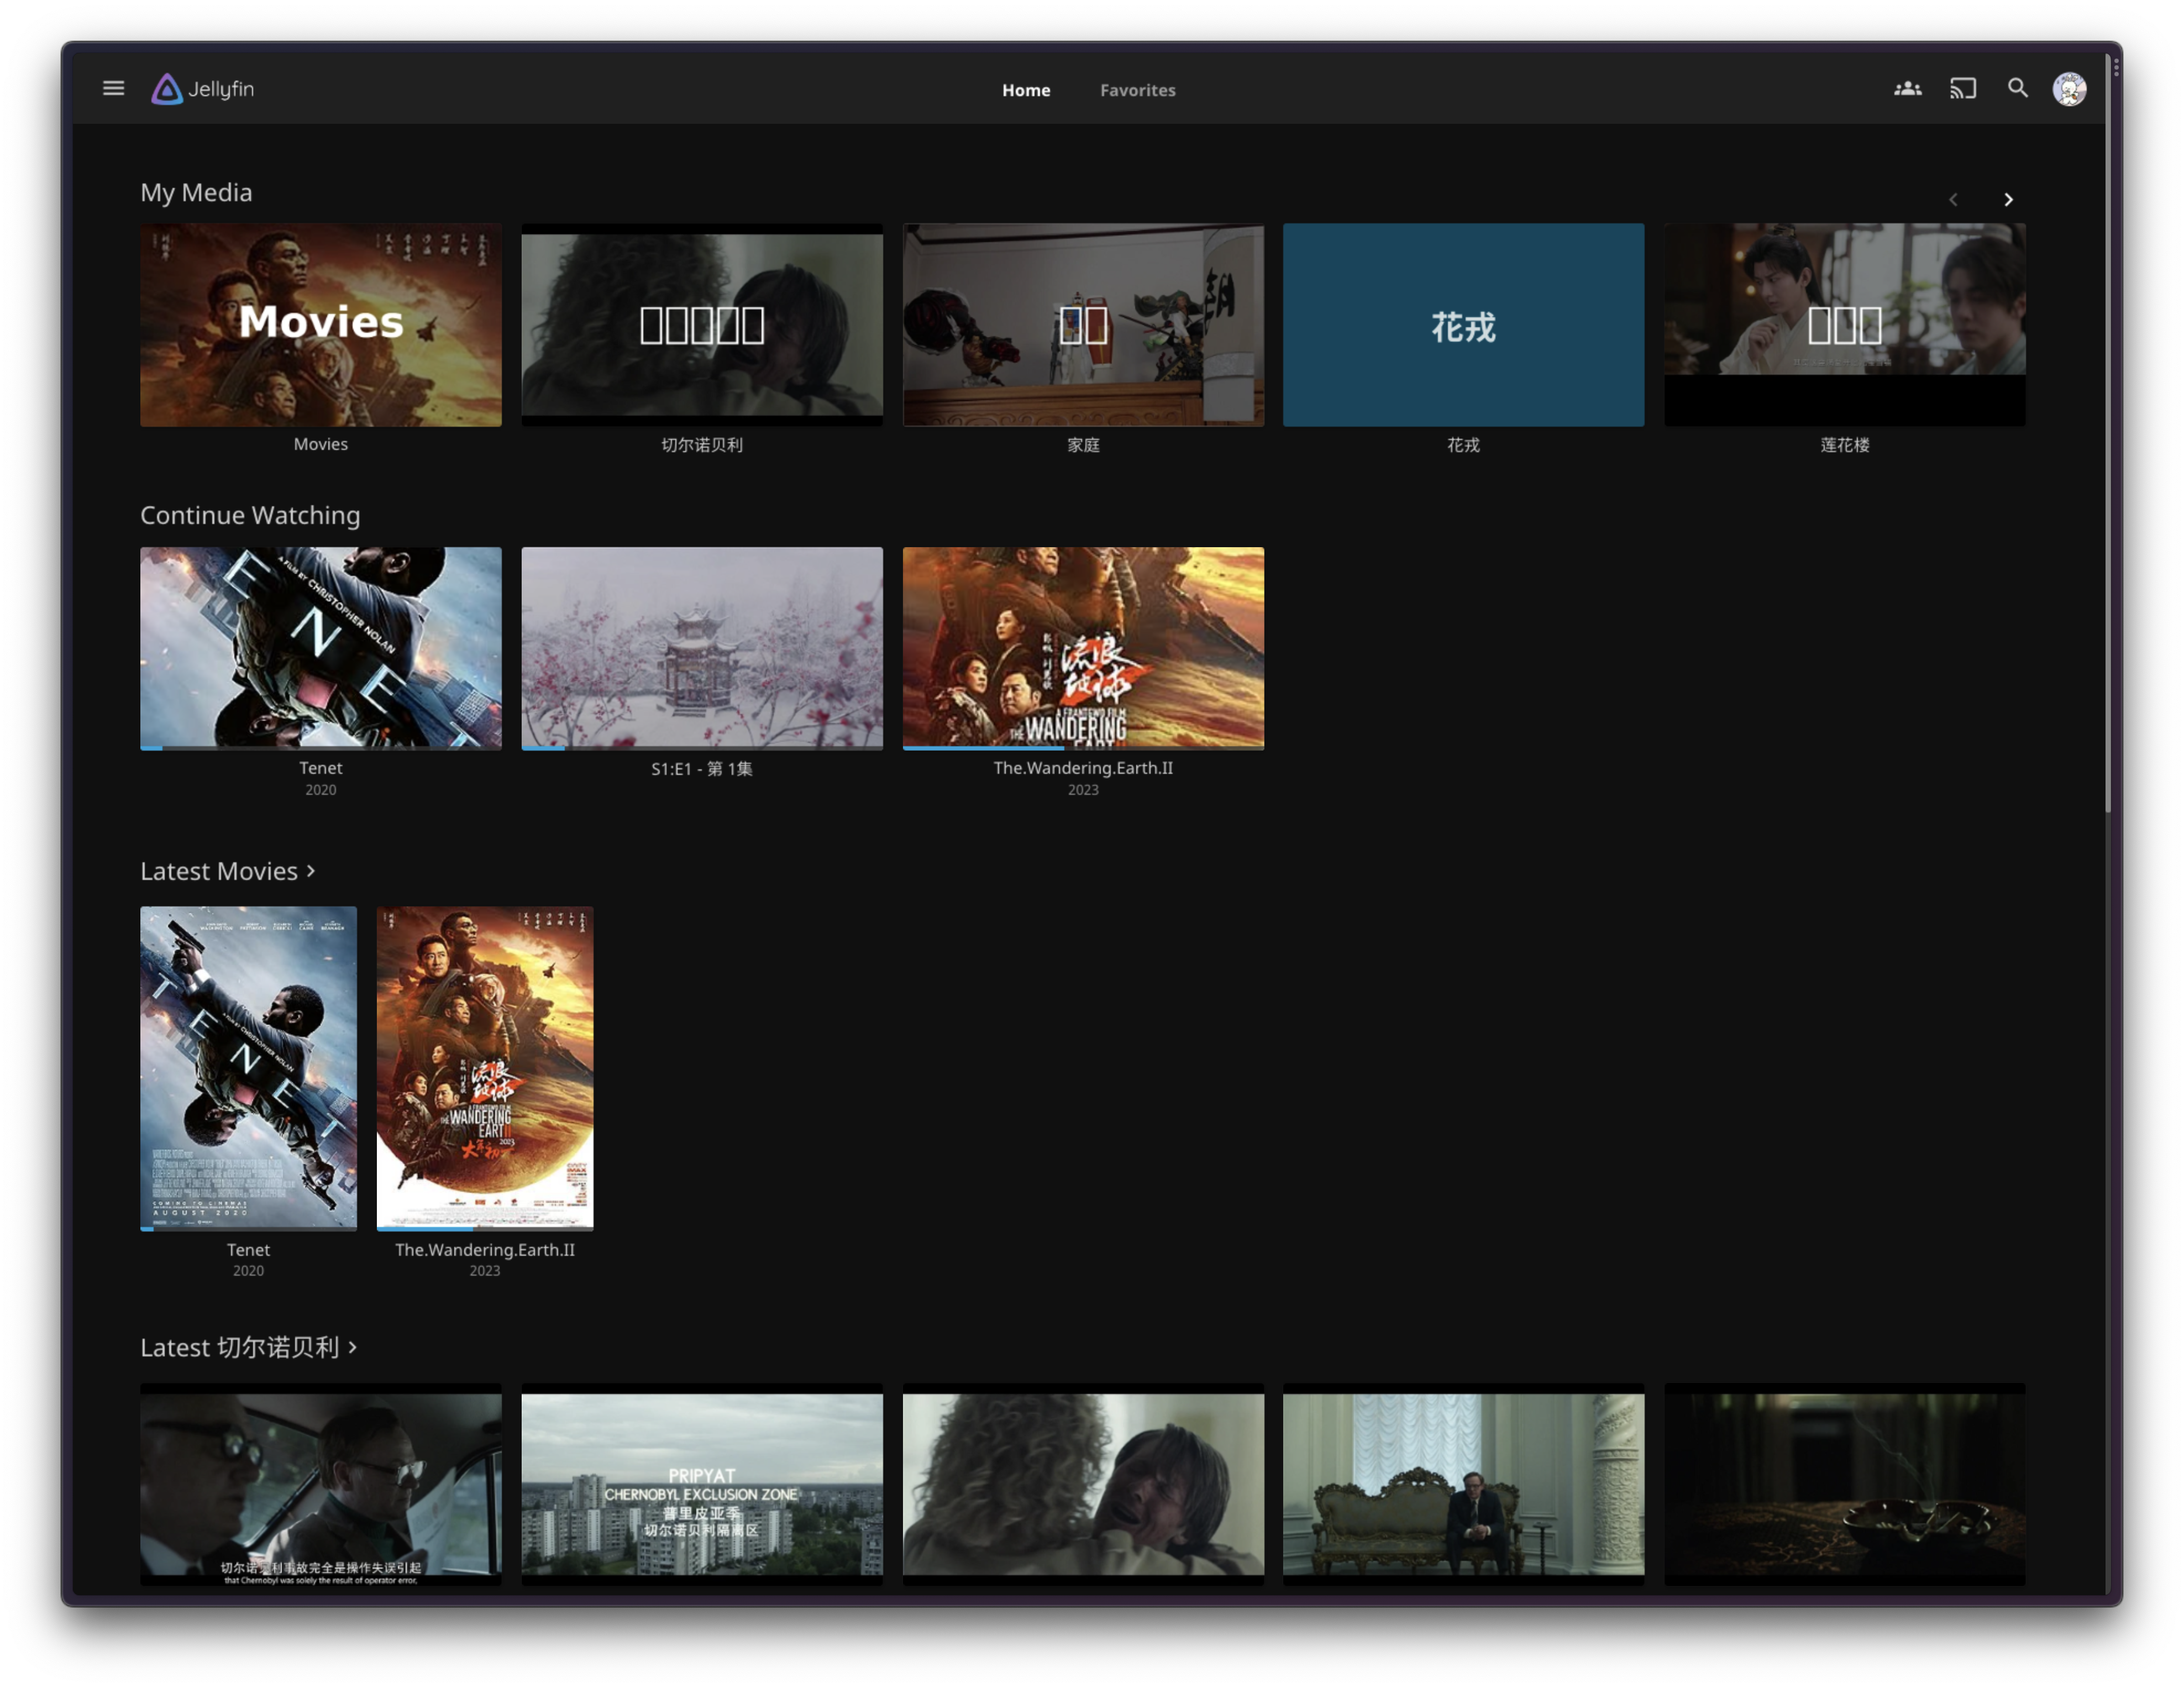
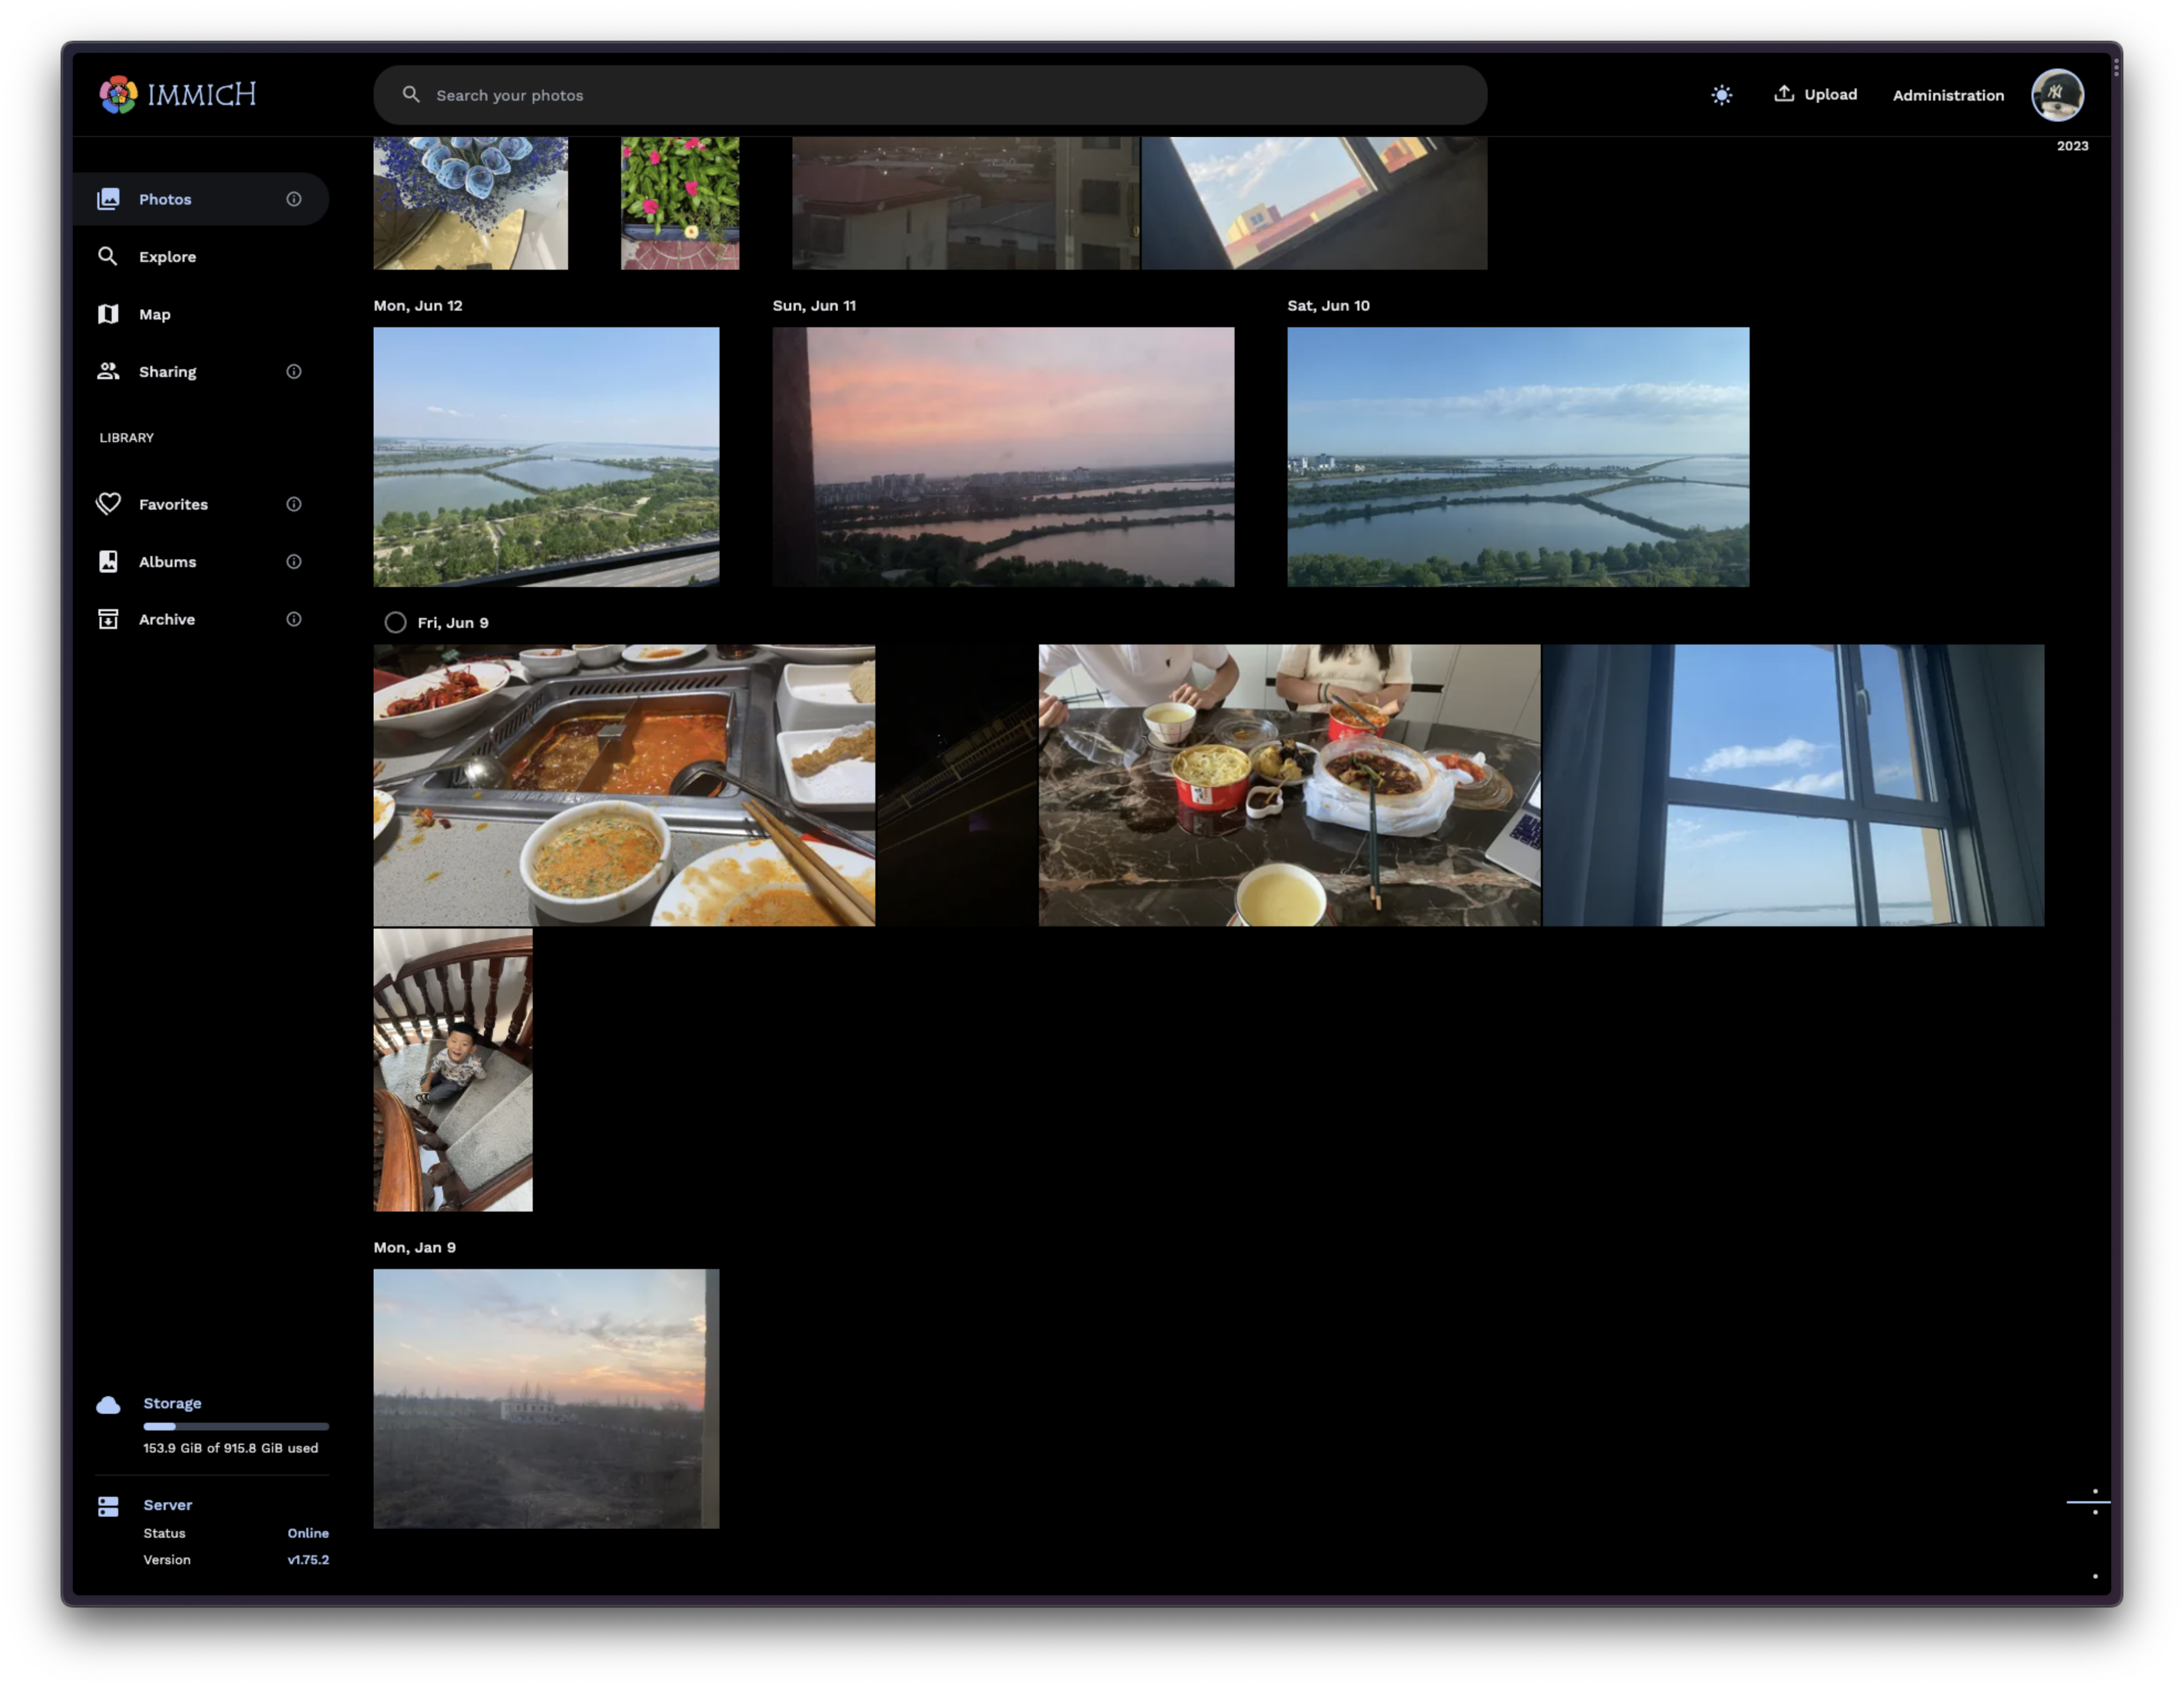
      <![CDATA[<p>简单的记录下自家的目前服务和解决方案</p><span id="more"></span><p>概况:</p><ol><li>面积, 整个房子共上下两层.</li><li>强电, 强电部分上下各一个配电箱.</li><li>弱电, 弱电部分全部汇总到二楼的弱电箱.</li></ol><h2 id="基础网络-拓扑"><a href="#基础网络-拓扑" class="headerlink" title="基础网络 拓扑"></a>基础网络 拓扑</h2><p>概况: 每个屋子均有预留网络, 墙内铺设超五类网线, 客厅留有 2 个网口, 且不使用 IPTV.</p><h3 id="硬件"><a href="#硬件" class="headerlink" title="硬件"></a>硬件</h3><ol><li>主路由: 小米的 AX6000</li><li>接入点(也是路由): TP-LINK 的 TL-WDR5620✖️3</li><li>交换机: TPLINK 的 TL-SG2008D</li></ol><h3 id="拓扑"><a href="#拓扑" class="headerlink" title="拓扑"></a>拓扑</h3><p><img src="/posts/82593b48/%E7%BD%91%E7%BB%9C%E6%8B%93%E6%89%91%E5%9B%BE.png" alt="拓扑图"></p><p>其中光猫为桥接模式, 由 AX6000 拨号 + DHCP服务器, 其余路由器作为接入点使用(有线 AP),IP 池从 234 开始倒序分配.</p><p>*因为没有 mesh 的路由器所以全是手动配置的呃呃呃呃</p><h2 id="服务提供"><a href="#服务提供" class="headerlink" title="服务提供"></a>服务提供</h2><p>全屋的服务主要是影音娱乐(吃 GPU 与 CPU 能力) 和不间断服务(需要长时间不关机 不吃 U 能力)</p><p>大部分包使用 docker 进行部署</p><h3 id="硬件-1"><a href="#硬件-1" class="headerlink" title="硬件"></a>硬件</h3><ol><li>不间断服务提供: raspberr-pi 4 [4GB+32GB(SD)+512GB(机械)]</li><li>影音: XPS15 (12 核 8GB+512GB(SSD)+1TB(机械))</li><li>传感器: ESP8266</li></ol><h3 id="软件"><a href="#软件" class="headerlink" title="软件"></a>软件</h3><h4 id="Docker"><a href="#Docker" class="headerlink" title="Docker"></a>Docker</h4><p>项目地址: <a href="https://www.docker.com/">https://www.docker.com/</a></p><p>安装位置: XPS15 &amp; raspberry-pi</p><p>方便项目部署的肯定得有, 要不然环境装这么多东西肯定很乱.</p><h4 id="Rsync"><a href="#Rsync" class="headerlink" title="Rsync"></a>Rsync</h4><p>项目地址: <a href="https://github.com/WayneD/rsync">https://github.com/WayneD/rsync</a></p><p>安装位置: XPS15 &amp; raspberry-pi &amp; 我自己电脑</p><p>用来局域网大文件互传, 在后面上传电视剧, 电影的时候巨好用</p><h4 id="CasaOS"><a href="#CasaOS" class="headerlink" title="CasaOS"></a>CasaOS</h4><p><img src="/posts/82593b48/casaos.jpg" alt="CasaOS"></p><p>项目地址: <a href="https://github.com/IceWhaleTech/CasaOS">https://github.com/IceWhaleTech/CasaOS</a></p><p>安装位置: raspberry-pi</p><p>这个就是一个 docker + 系统的 web 可视化管理, 有自己的 App Store也自带了一些 docker 的镜像一键安装, 但是版本都比较老, 我一般都是自己填参数什么的, 有 SMB 功能, 可以简单的当做云盘使用, 稍微有点点鸡肋但是界面挺现代化.</p><p>安装的话有一建安装脚本, 挺方便的</p><h4 id="Flare"><a href="#Flare" class="headerlink" title="Flare"></a>Flare</h4><p><img src="/posts/82593b48/flare.jpg" alt="Flare"></p><p>项目地址: <a href="https://github.com/soulteary/docker-flare">https://github.com/soulteary/docker-flare</a></p><p>安装位置: docker + raspberry-pi</p><p>轻量、快速的个人导航页面, 因为服务太多啦, 我用它来导航记录我各个服务的地址,无任何数据库依赖, 巨好用٩(•̤̀ᵕ•̤́๑)ᵒᵏᵎᵎᵎᵎ.</p><h4 id="HomeAssistant"><a href="#HomeAssistant" class="headerlink" title="HomeAssistant"></a>HomeAssistant</h4><p><img src="/posts/82593b48/homeassiant.jpg" alt="HomeAssistant"></p><p>项目地址: <a href="https://www.home-assistant.io/">https://www.home-assistant.io/</a></p><p>安装位置: docker(host) + raspberry-pi</p><p>最流行的家庭助理了算是, 能帮你接入各种平台的智能家具, 同时也有很大的扩展能力.</p><h5 id="HACS"><a href="#HACS" class="headerlink" title="HACS"></a>HACS</h5><p>项目地址: <a href="https://github.com/hacs">https://github.com/hacs</a></p><p>Homeassiant 的扩展商店能让你找到各种奇奇怪怪的插件和主题.</p><h4 id="memos"><a href="#memos" class="headerlink" title="memos"></a>memos</h4><p><img src="/posts/82593b48/memos.png" alt="memos"></p><p>项目地址: <a href="https://usememos.com/">https://usememos.com/</a></p><p>安装位置: docker + raspberry-pi</p><p>一个很轻量并且美观有很多功能的记事本软件, 使用 md 的语法, 能让我全神贯注的记录和快捷的搜索我的想法,</p><h4 id="Calibre-Web"><a href="#Calibre-Web" class="headerlink" title="Calibre-Web"></a>Calibre-Web</h4><p><img src="/posts/82593b48/Calibre.png" alt="Calibre"></p><p>项目地址: <a href="https://github.com/janeczku/calibre-web">https://github.com/janeczku/calibre-web</a></p><p>镜像标签: johngong&#x2F;calibre-web:latest</p><p>安装位置: docker + raspberry-pi</p><p>书库, 能自动从豆瓣等网站获取书籍信息, 后端是 py 的, 反应上来说稍微慢点但是好用, 我用来存漫画和小说还有一些项目的 pdf 文档.</p><h4 id="n8n"><a href="#n8n" class="headerlink" title="n8n"></a>n8n</h4><p><img src="/posts/82593b48/n8n.png" alt="n8n"></p><p>项目地址: <a href="https://docs.n8n.io/">https://docs.n8n.io/</a></p><p>安装位置: docker + raspberry-pi</p><p>一个简单的自动化, 是那种类似 node-red 的自动化, 但是这个更适合家用, 因为比较简单且带着各种常用的模块, 我一般用它自动给手机推送我关注的博客的 RSS 和每日的新闻.</p><h4 id="Grafana"><a href="#Grafana" class="headerlink" title="Grafana"></a>Grafana</h4><p><img src="/posts/82593b48/Grafana.png" alt="Grafana"></p><p>项目地址: <a href="https://grafana.com/">https://grafana.com/</a></p><p>安装位置: docker + raspberry-pi</p><p>用来监视家里服务器的运行状态和各个机子上 docker 的情况, 应该是有更厉害的用法, 目前没研究, 是一个可以高度自定义的监控面板.</p><h4 id="prometheus"><a href="#prometheus" class="headerlink" title="prometheus"></a>prometheus</h4><p>项目地址: <a href="https://prometheus.io/">https://prometheus.io/</a></p><p>安装位置: docker + raspberry</p><p>高性能时序数据库, 用来当我监视东西的后端数据库.</p><h5 id="node-exporter"><a href="#node-exporter" class="headerlink" title="node_exporter"></a>node_exporter</h5><p>安装位置: XPS15 &amp; raspberry-pi</p><p>提供电脑监视原数据</p><h4 id="jellyfin"><a href="#jellyfin" class="headerlink" title="jellyfin"></a>jellyfin</h4><p><img src="/posts/82593b48/jellyfin.png" alt="jellyfin"></p><p>项目地址: <a href="https://jellyfin.org/">https://jellyfin.org/</a></p><p>安装位置: docker + XPS15</p><p>作为本地的流媒体提供软件, 上面我用来存电视剧, 动漫等, 支持多客户端, DLAN 什么的, 很方便, 算是我家的家庭影音中心</p><h5 id="nvidia-container-toolkit"><a href="#nvidia-container-toolkit" class="headerlink" title="nvidia-container-toolkit"></a>nvidia-container-toolkit</h5><p>项目地址: <a href="https://docs.nvidia.com/datacenter/cloud-native/container-toolkit/latest/install-guide.html">https://docs.nvidia.com/datacenter/cloud-native/container-toolkit/latest/install-guide.html</a></p><p>安装位置: xps15 作为 docker 扩展</p><p>方便我 n 卡对视频进行硬件解码.</p><h4 id="immich"><a href="#immich" class="headerlink" title="immich"></a>immich</h4><p><img src="/posts/82593b48/immich.png" alt="immich"></p><p>项目地址: <a href="https://github.com/immich-app/immich">https://github.com/immich-app/immich</a></p><p>安装位置: docker + XPS15</p><p>作为我们家的家庭相册的云盘, 保存到云端, 来减缓手机压力与家人共享什么的</p><h2 id="未来设想"><a href="#未来设想" class="headerlink" title="未来设想"></a>未来设想</h2><p>搞个 open-wrt 做软路由在主路由旁当旁臂路由来作为家里的代理服务器.</p><p>音乐播放器, 这个马上就要整了.</p>]]>
    </content>
    <id>https://blog.zenlydsp.top/posts/82593b48/</id>
    <link href="https://blog.zenlydsp.top/posts/82593b48/"/>
    <published>2026-07-29T05:55:59.000Z</published>
    <summary>
      <![CDATA[<p>简单的记录下自家的目前服务和解决方案</p>]]>
    </summary>
    <title>浅谈我家的服务及实现</title>
    <updated>2026-11-03T01:04:39.953Z</updated>
  </entry>
  <entry>
    <author>
      <name>Zenlydsp</name>
    </author>
    <category term="亲情" scheme="https://blog.zenlydsp.top/tags/%E4%BA%B2%E6%83%85/"/>
    <category term="青春" scheme="https://blog.zenlydsp.top/tags/%E9%9D%92%E6%98%A5/"/>
    <content>
      <![CDATA[<p>我从未消失, 只是换了种方式于此陪伴你.</p><p>Her wishful face haunts my dreams like the rain at night.</p><span id="more"></span><h2 id="遗憾"><a href="#遗憾" class="headerlink" title="遗憾"></a>遗憾</h2><p>我的遗憾挺多的 怎么说呢 此时此刻 我最大的遗憾就是遗憾这两字不会写 手机还给我没收了 哎 好像很久没有像现在这样安靜地坐着想事情了 上一次应该还是在学校的晚自习 和老师干了一架翻墙跑了 之后纹了身 染了头 左青龙右白虎 当时觉得我最牛 现在想想真后悔 年少不知纹身贵 老来望臂空流泪说得真对 SKR 六年级暑假那会儿 我在网上刷到各种纹身图案 心痒得不行 为凑钱骗家里说要买手机 我爸一个月挣四千咬牙给了我两千我转头就进了纹身店 纹身师还说加个下山虎更霸气 现在想想他就是想多挣我几百 开学后学校不让露纹身大夏天的别人穿短袖我得穿长袖 捂得一身汗 同学问我热不热我说不热 可汗珠子顺着脖子往下淌摘在地上一摘一个印 初中没读完我就辍学了 做过服务员 老板见我胳膊上有纹身说客人看了害怕 又去学了计算机编程干了两个月头发都快给我敲秃了跑路了<sup id="fnref:1" class="footnote-ref"><a href="#fn:1" rel="footnote"><span class="hint--top hint--rounded" aria-label=": SKR.">[1]</span></a></sup>, 后来面试好几家 人家一看我胳膊就皱眉头 想去当兵 体检直接给我刷下来了 当初纹的时候谁也没告诉我以后找工作当兵这条路都给堵死了 现在想想纹身还不是我最遗憾的事 纹身可以洗 胳膊上的疤能淡 可回不去的日子是真的回不去了 我最后悔的是没好好上学 读技校那年翻墙出去上网 坐在网吧里觉得自己挺牛现在才明白那点牛气啥也不是 要是当时坐在教室里多听两节课 哪怕就两节 今天也不至干啥都不会 想起初中的时候 老师在黑板上写未来两个字 我在底下偷偷画小人 现在小人画了一堆未来却没了 想回学校 可那扇门已经关了 我羡慕那些穿校服的学生 他们见校服丑 我却连穿的资格都没有 你逃的不是课是人生 你翻的不是墙是底线 当时看到这句话觉得太中二了 现在想想中二的是我自己 要是能重来一回我一定坐在教室里把该念的书念完 把该做的题做了哪怕考不上大学至少脑子里有点东西手上有点本事 不至于像现在这样空着一双手不知道该往哪放 上初中时爸爸总是告诉我 打喷嚏是有人在想我 我反反复复猜了又猜 唯独没有猜到是现在的自己 哎…</p><h2 id="后记"><a href="#后记" class="headerlink" title="后记"></a>后记</h2><p>或许我和她的故事还在继续, 我不清楚这个故事能写多久, 但我希望是一万年.</p><section class="footnotes"><div class="footnote-list"><ol><li><span id="fn:1" class="footnote-text"><span>: SKR.<a href="#fnref:1" rev="footnote" class="footnote-backref"> ↩</a></span></span></li></ol></div></section>]]>
    </content>
    <id>https://blog.zenlydsp.top/posts/539b675f/</id>
    <link href="https://blog.zenlydsp.top/posts/539b675f/"/>
    <published>2026-03-26T13:10:51.000Z</published>
    <summary>
      <![CDATA[<p>我从未消失, 只是换了种方式于此陪伴你.</p>
<p>Her wishful face haunts my dreams like the rain at night.</p>]]>
    </summary>
    <title>myLover</title>
    <updated>2026-11-03T01:04:40.121Z</updated>
  </entry>
  <entry>
    <author>
      <name>Zenlydsp</name>
    </author>
    <content>
      <![CDATA[<p>Welcome to <a href="https://hexo.io/">Hexo</a>! This is your very first post. Check <a href="https://hexo.io/docs/">documentation</a> for more info. If you get any problems when using Hexo, you can find the answer in <a href="https://hexo.io/docs/troubleshooting.html">troubleshooting</a> or you can ask me on <a href="https://github.com/hexojs/hexo/issues">GitHub</a>.</p><h2 id="Quick-Start"><a href="#Quick-Start" class="headerlink" title="Quick Start"></a>Quick Start</h2><h3 id="Create-a-new-post"><a href="#Create-a-new-post" class="headerlink" title="Create a new post"></a>Create a new post</h3><figure class="highlight bash"><table><tr><td class="gutter"><pre><span class="line">1</span><br></pre></td><td class="code"><pre><code class="hljs bash">$ hexo new <span class="hljs-string">&quot;My New Post&quot;</span><br></code></pre></td></tr></table></figure><p>More info: <a href="https://hexo.io/docs/writing.html">Writing</a></p><h3 id="Run-server"><a href="#Run-server" class="headerlink" title="Run server"></a>Run server</h3><figure class="highlight bash"><table><tr><td class="gutter"><pre><span class="line">1</span><br></pre></td><td class="code"><pre><code class="hljs bash">$ hexo server<br></code></pre></td></tr></table></figure><p>More info: <a href="https://hexo.io/docs/server.html">Server</a></p><h3 id="Generate-static-files"><a href="#Generate-static-files" class="headerlink" title="Generate static files"></a>Generate static files</h3><figure class="highlight bash"><table><tr><td class="gutter"><pre><span class="line">1</span><br></pre></td><td class="code"><pre><code class="hljs bash">$ hexo generate<br></code></pre></td></tr></table></figure><p>More info: <a href="https://hexo.io/docs/generating.html">Generating</a></p><h3 id="Deploy-to-remote-sites"><a href="#Deploy-to-remote-sites" class="headerlink" title="Deploy to remote sites"></a>Deploy to remote sites</h3><figure class="highlight bash"><table><tr><td class="gutter"><pre><span class="line">1</span><br></pre></td><td class="code"><pre><code class="hljs bash">$ hexo deploy<br></code></pre></td></tr></table></figure><p>More info: <a href="https://hexo.io/docs/one-command-deployment.html">Deployment</a></p>]]>
    </content>
    <id>https://blog.zenlydsp.top/posts/4a17b156/</id>
    <link href="https://blog.zenlydsp.top/posts/4a17b156/"/>
    <published>2026-03-15T16:00:00.000Z</published>
    <summary>
      <![CDATA[<p>Welcome to <a href="https://hexo.io/">Hexo</a>! This is your very first post. Check <a href="https://hexo.io/docs/">documentation</a> for]]>
    </summary>
    <title>Hello World</title>
    <updated>2026-11-03T01:04:40.121Z</updated>
  </entry>
  <entry>
    <author>
      <name>Zenlydsp</name>
    </author>
    <category term="技术" scheme="https://blog.zenlydsp.top/categories/%E6%8A%80%E6%9C%AF/"/>
    <category term="hexo" scheme="https://blog.zenlydsp.top/tags/hexo/"/>
    <category term="网站" scheme="https://blog.zenlydsp.top/tags/%E7%BD%91%E7%AB%99/"/>
    <content>
      <![CDATA[<h2 id="前言"><a href="#前言" class="headerlink" title="前言"></a>前言</h2><p>最近发现腾讯云搞得博客费钱太多，并且因为我是未成年嘛，也没有办法备案，于是就准备去租一个香港的对象存储，然后搞静态博客，最后我选择了hexo，如你所见这个博客就是由hexo所搭建的</p><span id="more"></span><h2 id="hexo简介"><a href="#hexo简介" class="headerlink" title="hexo简介"></a>hexo简介</h2><p>Hexo是一款基于Node.js的静态博客框架，依赖少易于安装使用，可以方便的生成静态网页托管在GitHub和Coding上，是搭建博客的首选框架。快速、简洁且高效的博客框架。Hexo 使用 <a href="http://daringfireball.net/projects/markdown/">Markdown</a>（或其他渲染引擎）解析文章，在几秒内，即可利用靓丽的主题生成静态网页。</p><p>这次教程主要介绍：</p><ul><li>最基本的部署</li><li>撰写属于你的第一篇文章</li><li>了解文章的基本结构</li></ul><p>本文所采用的系统是MacOS，可能有些地方与Windows有所出入，如遇不会的地方还请评论区留下你的问题。</p><p>本文配有目录，可根据自己需求进行跳转</p><h2 id="部署"><a href="#部署" class="headerlink" title="部署"></a>部署</h2><h3 id="npm"><a href="#npm" class="headerlink" title="npm"></a>npm</h3><h4 id="安装"><a href="#安装" class="headerlink" title="安装"></a>安装</h4><p>在mac上部署npm其实吧也简单，需要用到homebrew，这部分我会单独开一篇文章来讲。</p><p>在这里我假设您已经安装好了homebrew</p><p>如何判断安装？</p><figure class="highlight bash"><table><tr><td class="gutter"><pre><span class="line">1</span><br></pre></td><td class="code"><pre><code class="hljs bash">brew -v<br></code></pre></td></tr></table></figure><p>如果出现版本号说明已经安装好</p><p>执行</p><figure class="highlight bash"><table><tr><td class="gutter"><pre><span class="line">1</span><br></pre></td><td class="code"><pre><code class="hljs bash">brew update<br></code></pre></td></tr></table></figure><p>更新homebrew</p><p>执行</p><figure class="highlight bash"><table><tr><td class="gutter"><pre><span class="line">1</span><br></pre></td><td class="code"><pre><code class="hljs bash">brew install npm<br></code></pre></td></tr></table></figure><p>进行安装npm。执行npm -v即可看到安装好的npm版本</p><h4 id="换源"><a href="#换源" class="headerlink" title="换源"></a>换源</h4><p>终端执行：</p><figure class="highlight bash"><table><tr><td class="gutter"><pre><span class="line">1</span><br></pre></td><td class="code"><pre><code class="hljs bash">npm config <span class="hljs-built_in">set</span> registry https://registry.npm.taobao.org<br></code></pre></td></tr></table></figure><p>npm安装与配置结束</p><h3 id="git"><a href="#git" class="headerlink" title="git"></a>git</h3><figure class="highlight bash"><table><tr><td class="gutter"><pre><span class="line">1</span><br></pre></td><td class="code"><pre><code class="hljs bash">brew install git<br></code></pre></td></tr></table></figure><p>即可安装完毕</p><h3 id="hexo"><a href="#hexo" class="headerlink" title="hexo"></a>hexo</h3><h4 id="安装-1"><a href="#安装-1" class="headerlink" title="安装"></a>安装</h4><p>所有必备的应用程序安装完成后，即可使用 npm 安装 Hexo。</p><figure class="highlight bash"><table><tr><td class="gutter"><pre><span class="line">1</span><br></pre></td><td class="code"><pre><code class="hljs bash">npm install -g hexo-cli<br></code></pre></td></tr></table></figure><h4 id="建站"><a href="#建站" class="headerlink" title="建站"></a>建站</h4><p>安装完成后，执行下述命令，hexo便会自动在指定文件夹添加所需文件。</p><figure class="highlight bash"><table><tr><td class="gutter"><pre><span class="line">1</span><br><span class="line">2</span><br><span class="line">3</span><br></pre></td><td class="code"><pre><code class="hljs bash">hexo init &lt;name&gt;<br><span class="hljs-built_in">cd</span> &lt;name&gt;<br>npm install<br></code></pre></td></tr></table></figure><p>执行完成后，使用</p><figure class="highlight bash"><table><tr><td class="gutter"><pre><span class="line">1</span><br><span class="line">2</span><br></pre></td><td class="code"><pre><code class="hljs bash">hexo g<br>hexo s<br></code></pre></td></tr></table></figure><p>便可以在<a href="http://localhost:4000中看到以下页面：">http://localhost:4000中看到以下页面：</a></p><p><img src="https://image-xiaozhizhen.oss-cn-qingdao.aliyuncs.com/2-24.png"></p><p>恭喜你现在你的博客就算是在你的本地跑起来了</p><h2 id="修改基本信息"><a href="#修改基本信息" class="headerlink" title="修改基本信息"></a>修改基本信息</h2><p>现在让我们来看一看这个文件夹中的东西都是什么</p><figure class="highlight bash"><table><tr><td class="gutter"><pre><span class="line">1</span><br><span class="line">2</span><br><span class="line">3</span><br><span class="line">4</span><br><span class="line">5</span><br><span class="line">6</span><br><span class="line">7</span><br><span class="line">8</span><br></pre></td><td class="code"><pre><code class="hljs bash">.<br>├── _config.yml <span class="hljs-comment">#网站的配置信息，您可以在此配置大部分的参数。</span><br>├── package.json <span class="hljs-comment">#应用程序的信息。您可以自由移除留下你需要的东西</span><br>├── scaffolds <span class="hljs-comment">#模版 文件夹。当您新建文章时，Hexo 会根据 scaffold 来建立文件。</span><br>├── <span class="hljs-built_in">source</span> <span class="hljs-comment">#资源文件夹是存放用户资源的地方</span><br>|   ├── _drafts<br>|   └── _posts<br>└── themes <span class="hljs-comment">#主题 文件夹。Hexo 会根据主题来生成静态页面</span><br></code></pre></td></tr></table></figure><p>不难看出“_config.yml”是这个站点的参数控制，以下是其翻译版本，加了一些必要配置</p><figure class="highlight bash"><table><tr><td class="gutter"><pre><span class="line">1</span><br><span class="line">2</span><br><span class="line">3</span><br><span class="line">4</span><br><span class="line">5</span><br><span class="line">6</span><br><span class="line">7</span><br><span class="line">8</span><br><span class="line">9</span><br><span class="line">10</span><br><span class="line">11</span><br><span class="line">12</span><br><span class="line">13</span><br><span class="line">14</span><br><span class="line">15</span><br><span class="line">16</span><br><span class="line">17</span><br><span class="line">18</span><br><span class="line">19</span><br><span class="line">20</span><br><span class="line">21</span><br><span class="line">22</span><br><span class="line">23</span><br><span class="line">24</span><br><span class="line">25</span><br><span class="line">26</span><br><span class="line">27</span><br><span class="line">28</span><br><span class="line">29</span><br><span class="line">30</span><br><span class="line">31</span><br><span class="line">32</span><br><span class="line">33</span><br><span class="line">34</span><br><span class="line">35</span><br><span class="line">36</span><br><span class="line">37</span><br><span class="line">38</span><br><span class="line">39</span><br><span class="line">40</span><br><span class="line">41</span><br><span class="line">42</span><br><span class="line">43</span><br><span class="line">44</span><br><span class="line">45</span><br><span class="line">46</span><br><span class="line">47</span><br><span class="line">48</span><br><span class="line">49</span><br><span class="line">50</span><br><span class="line">51</span><br><span class="line">52</span><br><span class="line">53</span><br><span class="line">54</span><br><span class="line">55</span><br><span class="line">56</span><br><span class="line">57</span><br><span class="line">58</span><br><span class="line">59</span><br><span class="line">60</span><br><span class="line">61</span><br><span class="line">62</span><br><span class="line">63</span><br><span class="line">64</span><br><span class="line">65</span><br><span class="line">66</span><br><span class="line">67</span><br><span class="line">68</span><br><span class="line">69</span><br><span class="line">70</span><br><span class="line">71</span><br><span class="line">72</span><br><span class="line">73</span><br><span class="line">74</span><br><span class="line">75</span><br><span class="line">76</span><br><span class="line">77</span><br><span class="line">78</span><br><span class="line">79</span><br><span class="line">80</span><br><span class="line">81</span><br><span class="line">82</span><br><span class="line">83</span><br><span class="line">84</span><br><span class="line">85</span><br><span class="line">86</span><br><span class="line">87</span><br><span class="line">88</span><br><span class="line">89</span><br><span class="line">90</span><br><span class="line">91</span><br><span class="line">92</span><br><span class="line">93</span><br><span class="line">94</span><br><span class="line">95</span><br><span class="line">96</span><br><span class="line">97</span><br><span class="line">98</span><br><span class="line">99</span><br><span class="line">100</span><br><span class="line">101</span><br><span class="line">102</span><br><span class="line">103</span><br><span class="line">104</span><br><span class="line">105</span><br><span class="line">106</span><br><span class="line">107</span><br><span class="line">108</span><br><span class="line">109</span><br><span class="line">110</span><br><span class="line">111</span><br><span class="line">112</span><br><span class="line">113</span><br><span class="line">114</span><br><span class="line">115</span><br><span class="line">116</span><br><span class="line">117</span><br><span class="line">118</span><br><span class="line">119</span><br><span class="line">120</span><br><span class="line">121</span><br><span class="line">122</span><br><span class="line">123</span><br><span class="line">124</span><br><span class="line">125</span><br><span class="line">126</span><br><span class="line">127</span><br><span class="line">128</span><br><span class="line">129</span><br><span class="line">130</span><br></pre></td><td class="code"><pre><code class="hljs bash">&lt;_config.yml&gt;<br><br><span class="hljs-comment"># Hexo Configuration</span><br><span class="hljs-comment">## Docs: https://hexo.io/docs/configuration.html</span><br><span class="hljs-comment">## Source: https://github.com/hexojs/hexo/</span><br><br>title: Hexo<br><span class="hljs-comment">#站点标题</span><br>subtitle: <span class="hljs-string">&#x27;&#x27;</span><br><span class="hljs-comment">#站点副标题</span><br>description: <span class="hljs-string">&#x27;&#x27;</span><br><span class="hljs-comment">#站点描述</span><br>keywords:<br><span class="hljs-comment">#站点关键词多个时使用“,”分割</span><br>author: John Doe<br><span class="hljs-comment">#作者昵称</span><br>language: zh-CN<br><span class="hljs-comment">#网站语言（默认为en应改为zh-CN）</span><br>timezone: <span class="hljs-string">&#x27;Asia/Shanghai&#x27;</span><br><span class="hljs-comment">#时区：使用电脑默认的就行</span><br><br><span class="hljs-comment"># URL</span><br><span class="hljs-comment">## Set your site url here. For example, if you use GitHub Page, set url as &#x27;https://username.github.io/project&#x27;</span><br><span class="hljs-comment">#设置你的网站地址，比如说，如果你使用github page，设置url像这样“https://username.github.io/project”</span><br>url: http://example.com<br>permalink: :year/:month/:day/:title/<br><span class="hljs-comment">#文章链接格式（一定要规范，方便爬虫爬取信息）</span><br>permalink_defaults:<br>pretty_urls:<br>  trailing_index: <span class="hljs-literal">true</span> <span class="hljs-comment"># Set to false to remove trailing &#x27;index.html&#x27; from permalinks</span><br>  trailing_html: <span class="hljs-literal">true</span> <span class="hljs-comment"># Set to false to remove trailing &#x27;.html&#x27; from permalinks</span><br><br><span class="hljs-comment"># Directory</span><br>source_dir: <span class="hljs-built_in">source</span><br><span class="hljs-comment">#资源文件夹，放在里面的东西就会生成出来</span><br>public_dir: public<br><span class="hljs-comment">#存放生成出来的静态文件夹</span><br>tag_dir: tags<br><span class="hljs-comment">#标签文件夹</span><br>archive_dir: archives<br><span class="hljs-comment">#归档文件夹</span><br>category_dir: categories<br><span class="hljs-comment">#分类文件夹</span><br>code_dir: downloads/code<br><span class="hljs-comment">#代码文件夹</span><br>i18n_dir: :lang<br>skip_render:<br><span class="hljs-comment">#不需要渲染的文件</span><br><br><span class="hljs-comment"># Writing</span><br>new_post_name: :title.md <br><span class="hljs-comment">#默认的名称</span><br>default_layout: post<br><span class="hljs-comment">#默认的布局模版</span><br>titlecase: <span class="hljs-literal">false</span><br><span class="hljs-comment">#是否将标题转化成标题形式</span><br>external_link:<br>  <span class="hljs-built_in">enable</span>: <span class="hljs-literal">true</span> <span class="hljs-comment">#在新建标签页中打开网页</span><br>  field: site <br>  exclude: <span class="hljs-string">&#x27;&#x27;</span><br>filename_case: 0<br>render_drafts: <span class="hljs-literal">false</span><br><span class="hljs-comment">#是否渲染草稿</span><br>post_asset_folder: <span class="hljs-literal">false</span><br><span class="hljs-comment">#是否启用 Asset 文件夹</span><br>relative_link: <span class="hljs-literal">false</span><br><span class="hljs-comment">#把链接改为与根目录的相对位置</span><br>future: <span class="hljs-literal">true</span><br><span class="hljs-comment">#显示未来的文章</span><br>highlight: <span class="hljs-comment">#代码块高亮显示</span><br>  <span class="hljs-built_in">enable</span>: <span class="hljs-literal">true</span><br>  line_number: <span class="hljs-literal">true</span><br>  auto_detect: <span class="hljs-literal">false</span><br>  tab_replace: <span class="hljs-string">&#x27;&#x27;</span><br>  wrap: <span class="hljs-literal">true</span><br>  hljs: <span class="hljs-literal">false</span><br>prismjs:<br>  <span class="hljs-built_in">enable</span>: <span class="hljs-literal">false</span><br>  preprocess: <span class="hljs-literal">true</span><br>  line_number: <span class="hljs-literal">true</span><br>  tab_replace: <span class="hljs-string">&#x27;&#x27;</span><br><br><span class="hljs-comment"># Home page setting</span><br><span class="hljs-comment"># path: Root path for your blogs index page. (default = &#x27;&#x27;)</span><br><span class="hljs-comment"># per_page: Posts displayed per page. (0 = disable pagination)</span><br><span class="hljs-comment"># order_by: Posts order. (Order by date descending by default)</span><br>index_generator:<br>  path: <span class="hljs-string">&#x27;&#x27;</span><br>  per_page: 10 <span class="hljs-comment">#每页数量</span><br>  order_by: -<span class="hljs-built_in">date</span> <span class="hljs-comment">#排序依据</span><br><br><span class="hljs-comment"># Category &amp; Tag</span><br>default_category: uncategorized <span class="hljs-comment">#默认分类</span><br>category_map: <span class="hljs-comment">#分类别名</span><br>tag_map: <span class="hljs-comment">#标签别名</span><br><br><span class="hljs-comment"># Metadata elements</span><br><span class="hljs-comment">## https://developer.mozilla.org/en-US/docs/Web/HTML/Element/meta</span><br>meta_generator: <span class="hljs-literal">true</span><br><br><span class="hljs-comment"># Date / Time format</span><br><span class="hljs-comment">## Hexo uses Moment.js to parse and display date</span><br><span class="hljs-comment">## You can customize the date format as defined in</span><br><span class="hljs-comment">## http://momentjs.com/docs/#/displaying/format/</span><br>date_format: YYYY-MM-DD<br>time_format: HH:mm:ss<br><span class="hljs-comment">## updated_option supports &#x27;mtime&#x27;, &#x27;date&#x27;, &#x27;empty&#x27;</span><br>updated_option: <span class="hljs-string">&#x27;mtime&#x27;</span><br><br><span class="hljs-comment"># Pagination</span><br><span class="hljs-comment">## Set per_page to 0 to disable pagination</span><br>per_page: 10<br>pagination_dir: page<br><br><span class="hljs-comment"># Include / Exclude file(s)</span><br><span class="hljs-comment">## include:/exclude: options only apply to the &#x27;source/&#x27; folder</span><br>include:<br>exclude:<br>ignore:<br><br><span class="hljs-comment"># Extensions</span><br><span class="hljs-comment">## Plugins: https://hexo.io/plugins/</span><br><span class="hljs-comment">## Themes: https://hexo.io/themes/</span><br>theme: landscape <span class="hljs-comment">#设置使用的主题</span><br><br><span class="hljs-comment"># Deployment</span><br><span class="hljs-comment">## Docs: https://hexo.io/docs/one-command-deployment</span><br>deploy:<br>  <span class="hljs-built_in">type</span>: <span class="hljs-string">&#x27;&#x27;</span><br><br></code></pre></td></tr></table></figure><p>在修改完这些信息后，使用</p><figure class="highlight css"><table><tr><td class="gutter"><pre><span class="line">1</span><br><span class="line">2</span><br></pre></td><td class="code"><pre><code class="hljs css">hexo <span class="hljs-selector-tag">g</span><br>hexo s<br></code></pre></td></tr></table></figure><p>便可在浏览器看到你修改后的效果</p><h2 id="开始创作"><a href="#开始创作" class="headerlink" title="开始创作"></a>开始创作</h2><p>你到现在已经完成了最最最基本的设置，现在便可以撰写文章了</p><h4 id="创建文章"><a href="#创建文章" class="headerlink" title="创建文章"></a>创建文章</h4><ul><li>命令行： 使用 <code>hexo new &lt;title&gt;</code></li><li>手动创建：在hexo主目录下<code>source -&gt;_posts</code>目录中创建<code>&lt;title&gt;.md</code>的文件</li></ul><h4 id="初步感知"><a href="#初步感知" class="headerlink" title="初步感知"></a>初步感知</h4><p>hexo的文章通常是由两部分构成的，分别是：</p><ul><li>Front-matter</li><li>正文</li></ul><h5 id="Front-matter"><a href="#Front-matter" class="headerlink" title="Front-matter"></a>Front-matter</h5><p>Front-matter 是文件最上方以 <code>---</code> 分隔的区域，用于指定个别文件的变量，举例来说：</p><figure class="highlight yaml"><table><tr><td class="gutter"><pre><span class="line">1</span><br><span class="line">2</span><br><span class="line">3</span><br><span class="line">4</span><br></pre></td><td class="code"><pre><code class="hljs yaml"><span class="hljs-meta">---</span><br><span class="hljs-attr">title:</span> <span class="hljs-string">Hello</span> <span class="hljs-string">World</span><br><span class="hljs-attr">date:</span> <span class="hljs-number">2026</span><span class="hljs-string">/02/27</span> <span class="hljs-number">23</span><span class="hljs-string">:47:57</span><br><span class="hljs-meta">---</span><br></code></pre></td></tr></table></figure><p>以下是预先定义的参数，您可在模板中使用这些参数值并加以利用。</p><table><thead><tr><th>参数</th><th>描述</th><th>默认值</th></tr></thead><tbody><tr><td><code>layout</code></td><td>布局</td><td><a href="https://hexo.io/zh-cn/docs/configuration#%E6%96%87%E7%AB%A0"><code>config.default_layout</code></a></td></tr><tr><td><code>title</code></td><td>标题</td><td>文章的文件名</td></tr><tr><td><code>date</code></td><td>建立日期</td><td>文件建立日期</td></tr><tr><td><code>updated</code></td><td>更新日期</td><td>文件更新日期</td></tr><tr><td><code>comments</code></td><td>开启文章的评论功能</td><td>true</td></tr><tr><td><code>tags</code></td><td>标签（不适用于分页）</td><td></td></tr><tr><td><code>categories</code></td><td>分类（不适用于分页）</td><td></td></tr><tr><td><code>permalink</code></td><td>覆盖文章网址</td><td></td></tr></tbody></table><p>只有文章支持分类和标签，您可以在 Front-matter 中设置。在其他系统中，分类和标签听起来很接近，但是在 Hexo 中两者有着明显的差别：分类具有顺序性和层次性，也就是说 <code>Foo, Bar</code> 不等于 <code>Bar, Foo</code>；而标签没有顺序和层次。</p><figure class="highlight subunit"><table><tr><td class="gutter"><pre><span class="line">1</span><br><span class="line">2</span><br><span class="line">3</span><br><span class="line">4</span><br><span class="line">5</span><br></pre></td><td class="code"><pre><code class="hljs subunit">categories:<br>- Diary<br><span class="hljs-keyword">tags:</span><br>- PS3<br>- Games<br></code></pre></td></tr></table></figure><h5 id="正文"><a href="#正文" class="headerlink" title="正文"></a>正文</h5><p>正文部分使用md语法撰写，详情可查看我的上一篇文章</p><h4 id="更新"><a href="#更新" class="headerlink" title="更新"></a>更新</h4><p>在你重新对你的博客做出更新后，通常需要部署到网站，下面介绍几个简单的指令。</p><p><code>hexo clean</code>:清理已经生成的静态文件</p><p><code>hexo g</code>:生成所需的静态文件</p><p><code>hexo s</code>启动本地服务，默认访问网站：<a href="http://localhost:4000/">http://localhost:4000</a></p><p><code>hexo d</code>:部署网站</p><blockquote><p>感谢您对本文的阅读，如果遇到不理解的地方，可以通过评论的方式进行交流</p><p>下一篇将会将博客部署在Github Pages上</p></blockquote>]]>
    </content>
    <id>https://blog.zenlydsp.top/posts/ddb9f012/</id>
    <link href="https://blog.zenlydsp.top/posts/ddb9f012/"/>
    <published>2026-02-27T15:47:57.000Z</published>
    <summary>
      <![CDATA[<h2 id="前言"><a href="#前言" class="headerlink" title="前言"></a>前言</h2><p>最近发现腾讯云搞得博客费钱太多，并且因为我是未成年嘛，也没有办法备案，于是就准备去租一个香港的对象存储，然后搞静态博客，最后我选择了hexo，如你所见这个博客就是由hexo所搭建的</p>]]>
    </summary>
    <title>hexo部署(一):本地部署</title>
    <updated>2026-11-03T01:04:40.121Z</updated>
  </entry>
</feed>